Archive for March, 2014

Vegetable Fabric Prints

My studio is located on the first floor of BallardWorks. The space I use was a printmaking studio for many years; now the printmakers work on the mezzanine behind me. They often pass through my studio on the way to theirs, stopping to visit along the way. Several weeks ago, Helen mentioned a project she’d done with her six-year old son. Taking inspiration from Bruno Munari’s book Roses in the Salad, they printed with vegetables. When I saw the book, I knew I had to try it with my own students.

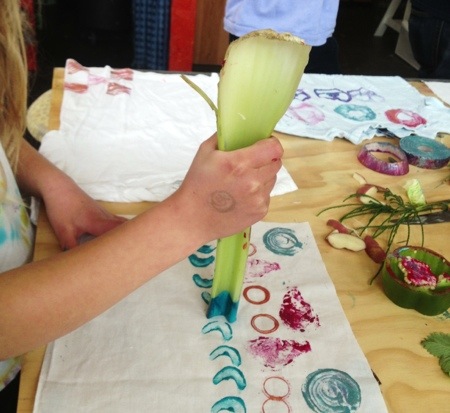
I pulled out some heat-set fabric inks and cut pieces of muslin. Using a vinyl mat as a work surface for the inks, I demonstrated how to spread the ink with a brayer to get an even layer, and how to dab the vegetables in the ink before making a print on the fabric.

20140330-110107.jpg

20140330-110125.jpg

20140330-110221.jpg

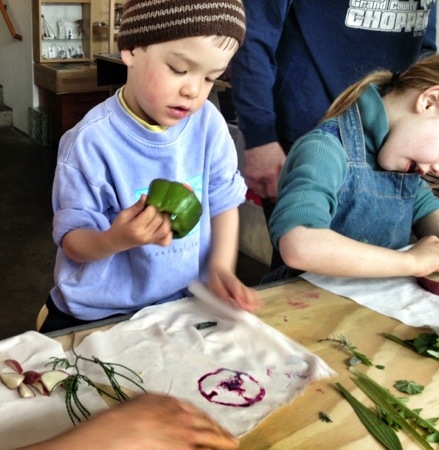
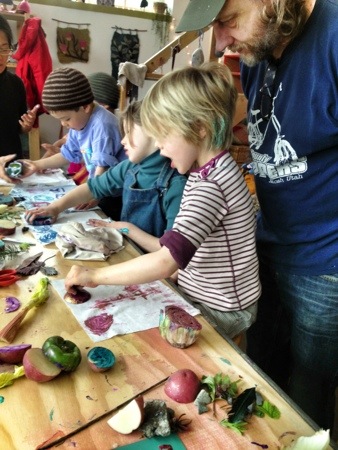
Beware: mess ahead. It wasn’t long before someone stuck their finger in the jar of ink to get different colors on specific parts of the pepper. Before I could say ‘whoa’, students were using their fingers and hands to paint on the fabric.

20140330-110244.jpg

Art is supposed to be messy and fun, but fabric ink is expensive and not meant for hands. Next time I will spend more time explaining the difference between finger paint and fabric ink. The kids were having so much fun exploring, it was hard to pull back on the reins.

20140330-110159.jpg

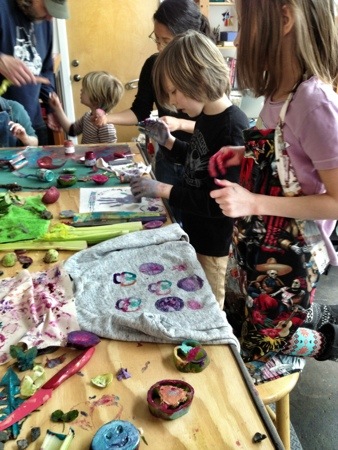
This student had a plan from the beginning. Working with a pocket knife (and his mother’s approval) he started by carving a handle, then squaring the sides of his potato. Next he cut lines in the potato and made some test prints to get his design just right.

20140330-110116.jpg

20140330-110134.jpg

20140330-110314.jpg

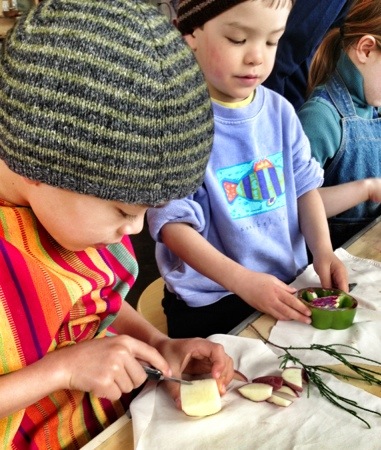
His younger brother inked some evergreen fronds, bell peppers and onions, with his mother’s help. It was delightful to see the result of their careful and thoughtful work.


Nunofelt Workshop at Pacific Northwest Art School

What happens when you bring fine merino wool together with a light, gauzy fabric? You get texture galore.

20120512-153116.jpg

From ruffles to puckers to subtle texture, there is endless possibility when working wool through fabric and then letting the magic of felting happen.

The weekend of April 26 and 27th, I will be teaching a two-day workshop at the Pacific Northwest Art School in Coupeville on beautiful Whidbey Island. Students will spend time experimenting with various fabrics to achieve different textures. Once they have sampled, they will create a scarf, wrap or shrug.

Tuition: $255, material fee: $40, registration fee: $15

Register online at www.pacificnorthwestartschool.org or by phone 360-678-3396.

Felt a Monster, Sew a Puppet

20140310-194130.jpg

Our studio fiber class continued the puppet madness. Students needlefelted faces on pieces of felt cut from a fulled blanket I thrifted two weeks ago.

20140310-183650.jpg

After the details are put in place, the front and back are whipstitched together. This puppet has tiny black button eyes and contrasting patterned arms.

20140310-183708.jpg

This octopus puppet with felt dread tentacles is just about ready to be sewn.

20140310-183719.jpg

A reverse black cheetah gets his last yellow spots.

20140310-183731.jpg

Button eyes and embroidered features bring this puppet to life.


Upcycled Felt Wearables

Today I brought a mixed tub of fulled wool fabric and a tub of wool roving for students to transform into accessories: hats, arm warmers and headbands.

20140228-150831.jpg

Before I get any further, I need to pull out my soap box to make a clarification. The handknit wool sweater thrown in the washing machine that emerges half the size it was before washing has been fulled, not felted.

When wool is spun into yarn, then knit (or woven or crocheted) into a new fabric and subsequently shrunk through vigorous agitation in hot soap and water, this is fulling. When unspun wool, also known as roving, is transformed into a solid fabric through vigorous agitation with hot soap and water, this process is called felting. As there is water involved, it is called wetfelting. Poking roving into a base fabric with a felting needle is a third technique called needlefelting, or sometimes dry felting.

When a friend brought in a whole bunch of sweaters she was no longer wearing, I cut them apart at the seams, tossed them in a couple lingerie bags and washed them in my top-loading washing machine in hot water with the dial turned to ‘heavy agitation’. Cutting a garment into pieces allows the fabrics to shrink more evenly. Sweaters fulled as an intact garment often have sections near armpits and neckline where they have not shrunk as much as the broad expanse of front and back.

Once a sweater has been fulled, and the fabric is ready to be put to another use, it is called recycled felt or upcycled felt. This distinguishes the fabric from industrial craft felt, or felt created through wetfelting wool roving.

burningtree_orange.jpg

Recycled felt is a perfect base for embellishing by needlefelting roving into the surface. The bond made with felting needles is not permanent, as it is when fibers intermingle during wetfelting. In order for the roving to stay firmly attached to the fabric, it must be poked repeatedly. This can be time consuming and tedious, but it is important if students want their designs to last. I recommend using a Clover multi-needle tool to finish a design once all the elements are in place.

20140228-150847.jpg

These two students spent the entire class needlefelting their designs. They were working with larger pieces of fabric. It will be interesting to see what they do with them next week.

20140228-151235.jpg20140318-215917.jpg

There’s a sheep with a rainbow tail hiding on the inside of this hat. Whipstitching seams can take a little time, but it will prevent the seams from coming undone over time.

20140228-150907.jpg

This student selected some upcycled felt with a colorful motif embroidered in the wool before it was fulled. Her two pieces of fabric once needlefelted and seamed made a fantastic bird hat.

20140228-150916.jpg

This student needlefelted cat eyes, nose and whiskers on two rectangles of fabric before sewing it into a hat for her little sister. By sewing two rectangles of fabric together, the peaks naturally form pointed ears. How lucky they are to have each other.


Flickr Photos

Categories