Archive for February, 2014

Needlefelting Puppet Faces

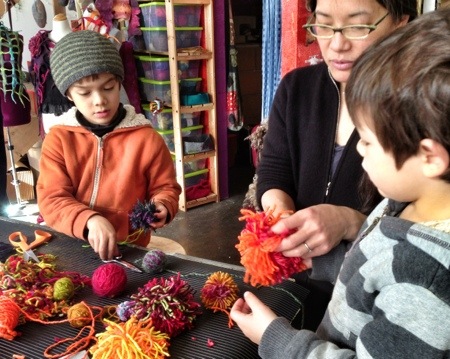
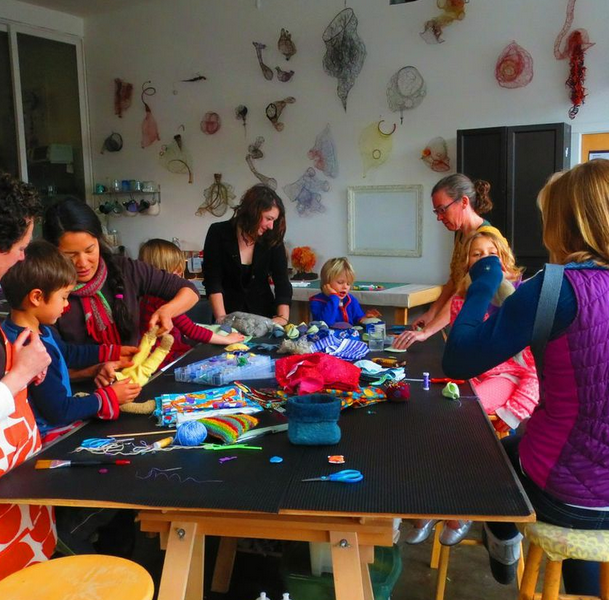
This week, students in both of my Family Learning Program clases began a project that will span two weeks.

20140228-151115.jpg

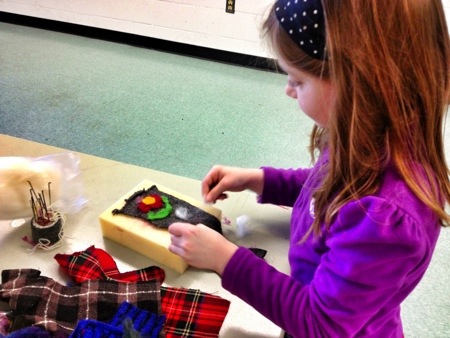
Using recycled or upcycled wool fabric harvested from fulled sweaters as their base, these students needlefelted Harrisville wool to create features for puppets. Harrisville is an ideal wool for needlefelting because it has lots of crimp and the fibers are not aligned, as in many rovings sold as a sliver. It also comes in a wide array of colors and can be quickly blended with your fingertips to create even more combinations.

20140228-151128.jpg

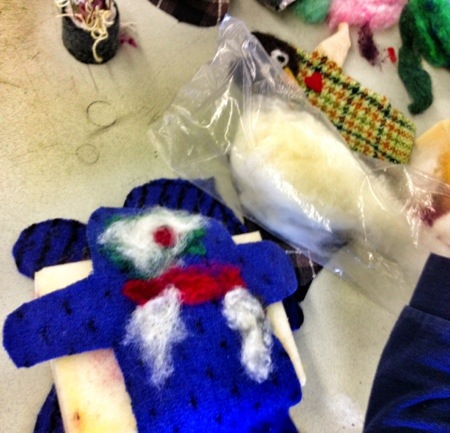
The students traced a cardboard outline onto two pieces of fulled wool, then cut along the contour lines. Next, they worked on adding faces to one piece of felt. This student is making a cyclops with a red mouth and fangs.

20140228-151136.jpg

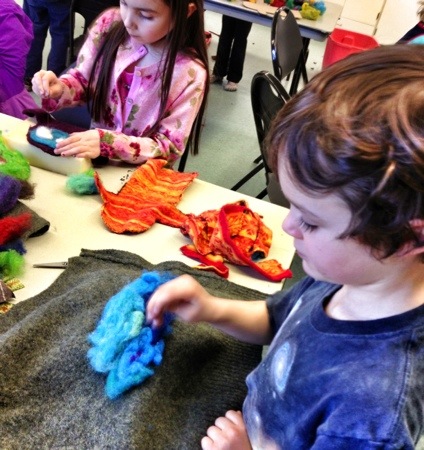
This student preferred to be the set decorator, creating backgrounds for the puppets he overhead various students describing. The mixed blues were going to be an ocean for another’s mermaid. He offered to make a tree for my sample owl puppet and a cave for the cyclops.

20140318-221905.jpg

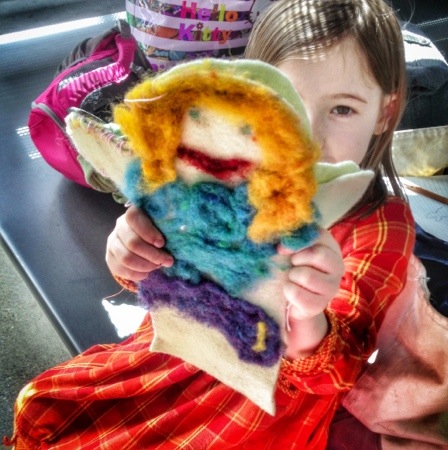
Adding surface embellishment to fulled fabric is an easy introduction to felting for young children. Working on a foam pad, they can keep track of where their fingers are, reducing the chance of accidental puncture or snapped needles. The best part for many children is the ultimate flexibility of the method. Don’t like that eye placement? Rip it off and put it somewhere else. Don’t like that color? Rip it off and choose another. Can you think of another medium better suited for those paralyzed by commitment anxiety? This is also a perfect way to allow children to experiment with color and texture.

Do You Like My Hat?

This week our class sewed hats out of fleece fabric, some embellished with ears, others with pompoms.

20140226-111411.jpg

Before starting to sew, everyone made a bunch of pompoms, winding yarn around their fingers, then tying a strand of strong cotton yarn around the middle. The process was thoroughly engrossing, filling the studio with colorful yarn confetti. Two of the students decided to focus on pompoms for the whole class. It was so fun to see the different shapes made by small and big hands, with lots of trimming or not so much.

20140226-111423.jpg

After the measuring the circumference of everyone’s head, we marked and cut the fleece. The circumference ranged from 20.5-22″, with students between the ages of 3-12 years, though for grins I measured my own head and it fit right in the range at 22″.

20140226-111451.jpg

Students who wanted a slouchy hat with lots of room cut two pieces 10.5″ x 10.5″; those who wanted a more snug fit cut two rectangles: 10.5″ x 6″. Some students rounded the corners before sewing while others whip-stitched around three straight sides.

20140226-111435.jpg

We had one request for a tall, pointed hat. Drawing frommy experience trying to knit a stocking cap, if the decrease starts at the bottom, it will pop right off the head. So, we measured 5″ from the bottom before drawing the point; this was roughly the distance from the bottom of his ears to the crown of his head. How cute is this little gnome in his peaked hat and denim bib overalls?

20140226-111441.jpg

To keep the corners from sticking out, Cindy, my able teaching partner, had this student sew a tab of fabric on the inside from corner to corner. With this modification, the ears became more pronounced and the hat indented on the sides in just the right spot.

20140226-111459.jpg

Hugs all around at the end of class warm everyone’s heart.

Child-Friendly String Art

Inspired by this project, I decided to introduce a simplified version of nail art to my class. Rather than working with wooden boards, I cut 7″ squares out of corrugated cardboard, then taped two pieces together. Rather than nails, I used small straight pins. The second piece of cardboard prevented the pins from poking out the back, and gave them a little extra stability.

20140221-120953.jpg

Before class, I wound 3 yards of crochet thread around cardboard bobbins so we didn’t have to spend a lot of time unwinding thread. The bobbins also made it easier to work around the pins as it was already in a tidy, palm sized bundle.

20140221-113815.jpg

20140221-121031.jpg

Hearts were a popular shape as our class coincided with St. Valentine’s Day.

20140221-113624.jpg

 A few of the students in the 5-7 yr old class found the project compelling, working layers and layers of thread around their pins. Most of the class was happy to create a single design. If boxes of valentines weren’t sitting outside the classroom waiting to be examined, the students might have stayed with the project a little longer. 

20140221-113804.jpg

The students in the 8-13 yr old class pulled the pins out after finishing their first attempt and rearranged them for a second or third design.20140221-113749.jpg

My sample was a square, but it didn’t take long before students branched out to create letters and more complicated shapes.

20140221-113738.jpg

This student spent a long time watching the process before deciding on a design. After observing for most of the class, she placed her pins and started stringing. She stayed after class for a bit, unable to leave it once she was underway. 

20140221-114025.jpg

In a moment of synergy, I visited a cousin in her home this week. Look at what she had propped up on the kitchen counter: string art made by her nanny, in the shape of a bird. Fans of the ‘Put a Bird On It’ episode of Portlandia will appreciate the irony as my cousin is a life-long Portland resident.

Free Sew

With this group of super creative kids, I decided the best project was no project. Rather than teach a new skill or introduce new materials, I pulled out a bunch of felt, thread, yarn, needles and let the students do whatever they wanted.

Screenshot from 2014-02-14 10_55_29

Things that were sewn today: a pair of butter yellow pants for a rabbit.

20140212-170648.jpg

We drew the outline of pants on a piece of paper, cut out two and then taped the edges together. We tried the paper pants on the rabbit to see if they fit. Then we traced the paper pattern onto felt, cut out two, pinned them together and started sewing. The waist was finished with a drawstring.

Screenshot from 2014-02-14 10_52_43

One of the mothers helped her young son blanket stitch two felt rectangles together to make a pouch.

20140212-170716.jpg

20140212-170737.jpg

There was a smaller felt pouch with a heart applique sewn together by another student.

20140212-170755.jpg

Boo has a new flannel coat with a felt heart applique and a purple button closure.

20140212-170813.jpg

This student blanket stitched a pouch with stacked hearts.

20140212-170835.jpg

There were sweet little drawings and notes composed for fortune cookies.

Screenshot from 2014-02-14 10_56_13

Projects not photographed: some small stuffed round pillows, a doll dress and a super child-sized cape.

20140212-170901.jpg

This fleece cow is a bit of show-n-tell. I love it when students bring in work they’ve created at home to share. The cow is wearing overalls. Both the animal and his outfit were imagined and completed with fabric scraps.

20140212-170909.jpg

This is not a hat, though it appears to be on someone’s head. This was intended to be a container with a strap; it’s life as a hat is temporary. The exciting part is this student taught himself how to cast on, knit and cast-off by watching videos. The only thing he asked me to show him was how to decrease. I’m so impressed by the genius of these kids.


Stitching Heart Pockets

With St. Valentine’s Day approaching, I planned to tie The Kissing Hand by Audrey Penn to sitched heart pockets, inspired by Molly’s Sketchbook -Sweetheart Charms. Having a physical way to hold onto a parent who is absent can be a great comfort. In the Kissing Hand, a mother raccoon reassures her little one that she will always be there, with a kiss placed in her paw.

20140209-170906.jpg

Unfortunately, when it came time to hunt down my copy, it was nowhere to be found. Instead I read Little Red: A Fizzingly Good Yarn by Lynn Roberts, which has nothing to do with hearts, but features a clever boy who negotiates peace in the forest by promising the wolf a jug of ginger ale every week.

My project samples were done with a blanket stitch around the perimeter because I like the tidy look, but I also had my intern make a whip stitch sample for my young students. While many of my students are capable of learning a blanket stitch, it would require a 1:1 student/helper ratio. Should anyone be interested in trying it at home, I think it would be entirely manageable.

Before class, I cut the shapes (two hearts and a triangle for the pocket), and threaded a bunch of needles with cotton floss so we could get right down to sewing.

20140209-170853.jpg

These students love to sew. Some were so eager to begin, they grabbed a needle and started sewing running stitches before I could explain the project. Others worked with one of my parent or student helpers and carefully worked delicate whip stitches around the perimeter. Some decided they didn’t want a triangle pocket; they preferred to leave a few stitches missing at the top so the entire heart was the pocket.

One boy was so thrilled with his heart that he decided to make a long loop for his heart so he could wear it as a necklace.

20140209-170834.jpg

Expecting this project would take the entire class, I only had enough pieces pre-cut to allow one project per student. But once the sewing bug bites, there is no stopping the fever. I had some felt circles cut out of a fulled blanket in my project box. They were intended for a future class, but the students were voracious. They snatched up the circles and started to whip stitch them together.

20140209-170843.jpg

I will be sure to keep a stash of extra felt pieces for cutting and sewing in my project box as a go-to activity for the sprinters in my class.

Planting The Seeds

Teaching crochet to a group is hard. Not enough of me, too little time, and unrealistic expectations mean that some projects as I envision them can’t be completed. For our second crochet class, I had planned to teach my 12 students how to crochet circles. We would sew two stitches in the circles to transform them into perfect little fortune cookies.

20140209-143000.jpg
By the end of class, I had not managed to work individually with each student, and my attempts to demonstrate the basics for the group had left most students mystified. One student who already knew how to crochet helped with fellow students’ questions, but our four hands weren’t enough for such a complex task. A few students doggedly improvised their way into circles, but some left the class with little more than they had before we started.

After class I lamented to a parent that I have difficulty differentiating from my students’ outcomes. This is the most difficult part of teaching. I forget how many countless hours I have spent working on process before creating a successful project.

She reminded me that I’m planting seeds. Some projects will resonate with some students and they will seek further instruction in a method. This class is an introduction to fiber materials and methods of manipulating them. My young grasshoppers have many years to learn, as do I.

Felt Heart Pockets and Vessels

Today’s project was a lesson in creativity, ingenuity and humility. As a teacher, I’m sure I learn as much from my students as they learn from me.  Before class, I had a project in mind and I had worked out how it was going to proceed, but I had not created a sample for the students to see. Some would say this is the best way to teach because the students don’t have a preconception of how a piece ‘should’ look to skew their innate creativity.

20140204-160515.jpg

We started out by drafting two layers of roving over a heart-shaped bubblewrap resist. After wetting the roving, we flipped the bundle, folded the roving over edge of the resist and then laid out two more layers of roving. The bundle was flipped again, the edges were folded over again to create a sealed package. If you want more detailed photos of the process, there is a felt vessel tutorial I wrote here.

Screenshot from 2014-02-14 10_30_57

The students folded their bubble wrap on top of the heart bundle and rubbed, gently at first and then more vigorously. When the roving started to hold together, they dunked it in warm water and then rubbed a whole lot more.

20140204-160546.jpg

This student project end up exactly as I had conceived it. After rinsing out the soap and giving it a dunk in a vinegar bath, the students cut a small slit near the top. They pulled out the bubblewrap to reveal a pocket. When dry, I imagined they would write a little valentine and slip it inside.

20140204-160535.jpg

The loop of single ply yarn (placed between the layers of roving when the batt was still dry) can be used to hang the ornament.

For one student, the bubblewrap resist shifted early in the felting process; her end result had three lobes and looked more like an anatomical heart than a typical valentine. She sliced it open, removed the plastic. Without skipping a beat she said ‘I wonder what it would look like if I turned it inside out’ and then did so. She pushed and pulled a little and suddenly it was a little vessel, perfectly sized for the turquoise felt ball she’d brought from home.

20140204-160556.jpg

It wasn’t long before the entire class had slit their hearts wide open and flipped them inside out. I didn’t grab a picture of the whole class set, but I have to admit they are much sweeter as little petal vessels than the hearts I had imagined.

Lesson learned: put down your expectations and step away from the table. You have no idea what power these children wield in their imaginations.

Popsicle Stick Loom

In order to continue working those muscles necessary for fine motor control, my youngest class of fiber arts students embarked on a weaving project.

This fixed-warp loom was designed (and used with permission) by a student in my studio class. She glued together a frame of popsicle sticks and added three more sticks to create an immovable warp.

20140202-121047.jpg

20140202-121101.jpg

Ever the innovator, this student decided he wanted to weave the middle of his loom last. I believe the eyelash yarn was intended to be the show-stopper holding court in the middle of the piece.20140202-121108.jpg

With little additional help, the students were able to fill their looms with colorful yarns. The beauty of this project is that it costs little in terms of materials and the prep can be done a few hours in advance. I assembled the looms the previous day. The downfall is that the weaving can not be easily removed from the popsicle sticks. This a single use loom.

20140202-121120.jpg

Drawing inspiration from a nest helper kit we hung in our cherry tree several years ago, I stuck some cast-off yarn cuttings between the weft. Birds and squirrels can pluck the fluffy bits out to pad their nest.

We read Three Billy Goats Fluff by Rachael Mortimer. This has to be the best reselling of this story I’ve read. I’m buying it for my story collection.

Teaching Beginning Crochet

This week my older fiber arts class began learning to crochet. We started with a simple chain stitch. For students familiar with finger-knitting* this was an easy transition.

Once students mastered working with the crochet hook to create chain stitches, I substituted some yarn I’d worked up the night before. Crocheting into chain stitches, which beginners invariably wrangle into impossibly tight bumps, is an exercise in needless frustration. I crocheted a string of 10 chain stitches and then a row of half-double crochet stitches with nice open spaces for students to begin their first row. Only four students out of twelve made it this far in our hour class.

20140202-121318.jpg

One student continued to work in the background during my subsequent class. She brought this great triangle to me after the second hour. Without any direction from me, she had figured out how to single crochet. I was so proud of her ingenuity and diligence.

If a triangle is what you are trying to create then voila! Stitching together a whole bunch of triangles would make a great pattern. If a rectangle is more to your liking, then at the end of each row, crochet a single chain stitch. This allows your hook to ‘climb the ladder’ to the next row.

Everything I know about crochet I learned from Debbie Stoller’s Happy Hooker. Another great title is Kids’ Crochet by Kelli Ronci.

One of the things that makes me most fired up is the intersection between art, math, science and community. In 1997, Daina Taimina was the first mathemetician to model hyperbolic geometry; the method was crochet. Coral are one of the lifeforms that exhibit hyperbolic geometry with their expanding planes which maximize the surface area through which nutrients can be absorbed.

Margaret Wertheim presents the intersections between the theory, the art and activisim in her 2009 TED talk “The Beautiful math of coral“. I had downloaded it to play for the class, but we didn’t have enough time. Margaret and her sister Christine have created a brilliant community art project to raise awareness about the environmental damage being sustained Great Barrier Reef due to global warming using crochet. You can read more here: http://crochetcoralreef.org/

20140202-121326.jpg

The day before I class, I taught my intern, Zelda, how to crochet. Without any direction from me, she created a coral form by crocheting two stitches into each stitch in the previous row. As the form grows, it naturally curls over on itself. Should she continue this nubbin, it will create an enormous whorl, the likes of which you might see if you dive down to the Great Barrier Reef.

*I bristle whenever I hear people refer to a string of chain stitches as finger-knitting. It grates on that nerve dedicated to nomenclature and precise language. For the love of dog, let’s call this process what it is: finger-crochet.

Felting Pictures

My studio fiber arts class created felt pictures this week. They started with merino batts from Opulent Fibers as a background then cut shapes out of the prefelt we dyed with Kool-Aid last week and added additional embellishments with small pieces of merino roving.

The merino batt allows novice students to skip the tricky step of drafting thin shingles of roving into an even layer. The batt arrives as a thick roll; once unrolled, it can be cut like prefelt and peeled apart to separate layers of the correct thickness for the project at hand.

20140129-101622.jpg

Once the details were in place, they squirted some warm soapy water over the felt. Since we didn’t want the wool details to move around, some students layered a piece of nylon tulle over their design. Other students folded over the bubble wrap to cover the felt, rubbing gently through the plastic.

20140129-101631.jpg

We peeked at the work in progress often to see how it was felting. The tulle only needs to stay on the surface until the layers of roving begin to felt to each other. Once the lines demarcating the cut edges begin to fade, the felt is firm enough to work directly by hand with a gentle rubbing motion.

While many traditional feltmakers roll the felt design and bubblewrap around a styrofoam noodle, then roll the whole package in a towel to accomplish a firm felt; I have found that it works just as well to vigorously rub felt by hand. In my experience, rolling felt in bubblewrap often causes creases to develop and skews the design. I rarely roll work, though there are exceptions to the rule. For the purposes of this class, it is unnecessary work and mess.

20140129-101645.jpg

Once the felt was holding together, we squeezed out the cold water and dunked it into a small basin filled with hot water. Then we bunched up the felt and rubbed it on the ridged mat covering my worktable. Using hot water causes the felt to shrink rapidly, so it should be used sparingly in the early stages to control the process.

To finish up the edges, we rubbed the felt with a glazed ceramic felting stone and a palm washboard. This helped smooth out the wavy ledges that don’t get as much attention in during the hand-felting steps.

20140129-101638.jpg

The students and parents were excited by both the process and the results.

Screenshot from 2014-02-15 17_39_51


It’s hard to make out the details for all the grins here, but the picture on the left is a giraffe sliding down a rainbow on it’s back. The middle picture is an ocean floor seascape. The picture on the right is a herd of anatomically correct cows.

Screenshot from 2014-02-15 17_41_15

To display work at home, thread a few pieces of yarn through the upper edge and tie to a pretty foraged stick.


Flickr Photos

Categories