This post is intended as an archive of the projects created in the fiber arts class I designed for the Family Learning Program. Taught weekly at the Southwest Teen Life Center in West Seattle, the Family Learning Program was established to provide curriculum enrichment to homeschool families.
Week 1: Embroidery

Our first week started with an exercise in simple embroidery on recycled wool fabric and pieces cut from a fulled wool blanket to create nametags. Students embroidered their names on the off-white blanket fabric using a blunt needle and wool tapestry yarn. After selecting wool fabric, they sewed a pinback to one piece. Next, we cut out interfacing, and ironed it between two pieces of wool fabric to create additional stability. The last step was adhering the embroidered blanket fabric to the stiffened wool fabric using another piece of interfacing.
As some students were still working on their embroidery when class ended, they either chose to continue working on them at home, or left them with me to complete in week 2.
Recommended reading: Kids’ Embroidery by Kristin Nicholas
Week 2: Sewing

In the second week, students stitched needlekeepers out of manufactured wool felt. Closures were braided out of yarn, or sewn with buttons to the felt. Students were encouraged to embellish or decorate the felt with embroidery stitches or buttons.
Felt sheets sold in fabric stores are either acrylic, a bamboo blend or wool. Acrylic felt is the least expensive, has a slightly squeaky feel when rubbed between your fingers, and is a little more difficult to sew than 100% wool felt.
Upcycled or recycled felt fabric can be created by deliberately shrinking a loosely woven or knit fabric (blanket, skirt, sweater) in the wash. This process is known as fulling. Pendleton blankets and shirts are made from fulled wool yardage. Fabric and craft stores sell pre-cut, packaged shapes harvested from recycled fabric. There are many craft books with simple stitching, sewing and embroidery projects made with felt. Cutting up an accidentally fulled sweater is a great way to get the fabric required to start one of these projects.

Recommended reading: Warm Fuzzies: 30 Sweet Felted Projects by Betz White; Stash Happy: Felt: 30 Fun Projects for Felt (and Fabric) Lovers by Amanda Carestio; Super-Cute Felt: 35 Step-By-Step Projects to Make and Give by Laura Howard
Week 3: Needlepoint
 In the third week, we worked on needlepoint using rigid plastic grids. Students were shown how to do the simplest over-under-over stitch, which leaves some of the plastic grid visible. They also were shown how to do the traditional needlepoint stitch, passing through a square twice (once going up a column, and once going down a column). This covers the grid in a dense pattern of diagonal stitches. Several colors of yarn can be used in a single piece, carrying the yarn across the back between sections.
During class, I noticed one student creating a spiral pattern, similar to a spiderweb and another student crossing four columns of squares for an elongated diagonal stitch.
To further explore this idea, plastic grids are sold in 10″ x 13″ sheets at craft stores. Cut a grid into six pieces, fill each grid with needlepoint and then stitch them together to create a box or a tote.
We used wool yarn for this project as it will expand to fill the gaps between the grid lines nicely, but needlepoint is typically done with either wool tapestry yarn, cotton or silk floss. Separate the strands for fine color work.


For students ready for a further challenge, try stitching on gingham fabric, using the colored grid as a guide or move on to traditional needlepoint fabric which has a fine grid built into the weave. Draw a pattern on the fabric with colored markers, then follow the color changes with the floss. Some people find it is easier to handle fabric when held taught by an embroidery hoop, but this can be cumbersome and more difficult for some hands to manage. We started with plastic grids so students could focus on their stitching instead of worrying about keeping the fabric stable.
Week 4: Weaving
For students ready for a further challenge, try stitching on gingham fabric, using the colored grid as a guide or move on to traditional needlepoint fabric which has a fine grid built into the weave. Draw a pattern on the fabric with colored markers, then follow the color changes with the floss. Some people find it is easier to handle fabric when held taught by an embroidery hoop, but this can be cumbersome and more difficult for some hands to manage. We started with plastic grids so students could focus on their stitching instead of worrying about keeping the fabric stable.


Weaving just a few rows of the warp with one color and the the rest of the warp with another color for a few rows will create an opening that can become a buttonhole. The buttonhole should be followed up with several rows of dense weaving across the entire width of the loom to close the gap.
Try adding dried grasses or lavender to the woven piece. Feathers and flowers can be added to a section. This preschool teacher created a beautiful woven roof for a backyard playhouse using materials harvested on their nature walks.
Recommended reading: Kids’ Weaving by Sarah Swett
Week 5: Needlefelting
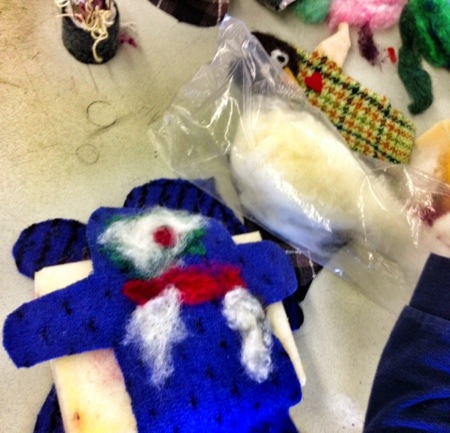
In week 5, students needlefelted pumpkins and creatures using wool roving. Needlefelting is ideal for creating soft sculpture and adding surface embellishment to many fabrics. Layers of wool can be added to create dimension, in the same way a sculptor would add small bits of clay to create a nose, brow and cheek ridges on a face. Individual fibers are poked together without creating a permanent bond. This is both a blessing and a curse. Should the artist decide they don’t like the way an ear is perched on their squirrel, it can be easily removed and repositioned. It also means that Fido will likely tear the felt squirrel to bits the first time it is left unattended.
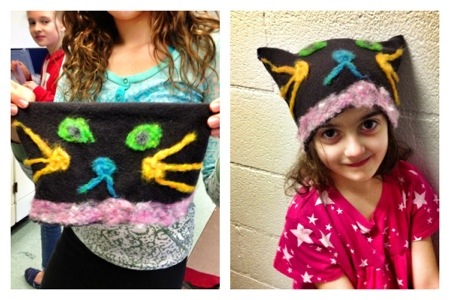
Surface designs can be needle felted easily to wool felt; many craft books suggest creating custom pillows with needlefelted designs. Because the wool is only poked into place with the needles, the design will pill over time and may rub away if it is in a high-traffic spot. To afix the design permanently, it should be washed with hot water (either by hand or in the machine). We will explore wetfelting in the coming weeks.
The needle tips are fragile, so should be used with care and with adult supervision. Used correctly, in a vertical poking direction (as opposed to poke and twist or aggressive stabbing), needles should last many years.

The type of roving we used was from Corriedale sheep; it had been washed, dyed and ironed to straighten the fibers. A general rule of thumb when evaluating roving is to look for a coarse wool with lots of texture. The felting needles will grab a coarse wool more easily than a fine wool.

One of the younger students in the class made a pair of bumblebees, a pair of ladybugs and several more creations from her imagination.
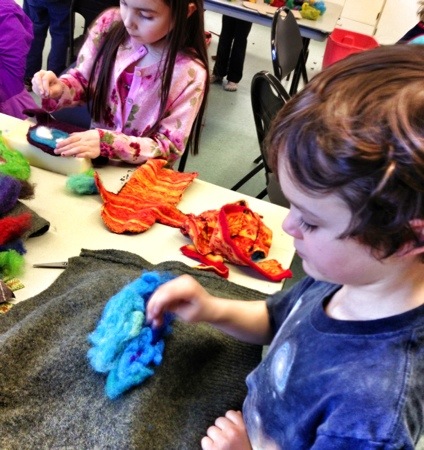
Single felting needles are sold in several gauges, from 36-42, rated for the coarseness of the fiber. We used the medium gauge size 38 needle. Clover makes a spring-loaded multi-needle tool which is useful when finishing a large design to tamp it down. In the background of this photo, there is a handmade multi-needle tool I bought from Moxie, a Seattle artist. The multi-tools are much more likely to result in unintentional finger stabbing. With a little coordination, using two single needles held together in one hand can be an efficient way to speed up the process, but I still return to a single needle when working to get a small detail fixed in place.
You can buy needles and wool roving at Weaving Works on Brooklyn Ave in the University District. I also sell needles, roving and felting kits through my studio and Etsy shop: http://kneek.etsy.com.
The Japanese bookstore Kinokuniya, located inside the International District Uwajimaya has many small books full of inspiring projects: pastry, cartoon characters, novelty foods. While the instructions are written in Japanese, the illustrations are sufficient to guide you through many projects.
Recommended reading: Wool Pets by Laurie Sharp; Felted Feathered Friends by Laurie Sharp; Little Felted Animals by Marie-Noelle Horvath.
Week 6: Wetfelting
We jumped into my favorite subject this week: making felt from wool. I showed the students raw wool in the grease, and the same locks once washed. Then I demonstrated how the locks are turned into batt using hand carders.

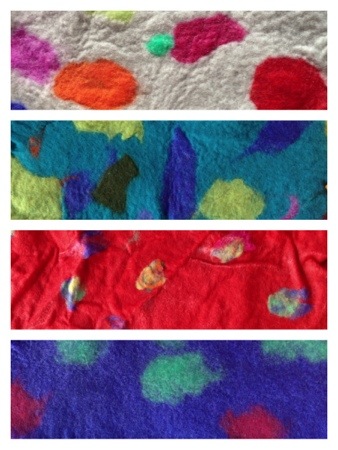
Next we laid out small pieces of merino batt on 10″ squares of batt I had previously cut. Dyed locks, yarn and small pieces of pre-felt were also available as additional embellishments. I chose to use batt to minimize the difficulties beginning students have with drafting fine layers of roving.
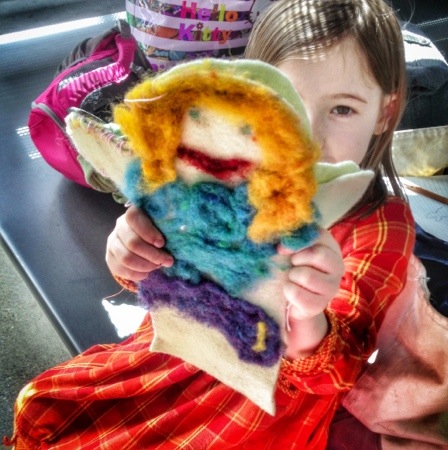
Once the design was complete, we placed them on a 12″ square of bubble wrap, then slipped the batts into a ziploc bag, squirted in some warm soapy water, then sealed. We started by tapping the bags with our fingers and then pounding the bags with our fists. At this first stage, the designs are fragile. Details may move around if agitation is too vigorous. Tapping is a way to agitate the wool without disturbing the design. After three or four minutes of tapping, open the bag, and peek at the wool. Is there a sharp delineation between the surface design and the background? If yes, then the design is still fragile and should be tapped or pounded longer. Can you see the small fibers migrating into the base? If yes, then the design is felting well and you can work more vigorously. Seal the bag again, then rub the wool around on the bubble wrap. After ten minutes of vigorous agitation, open the bags again. As the wool transitions to felt, it will start to shrink. The edges may fold over on themselves, but they can be peeled away and straightened along the way. Pour a little more hot water on the felt, then rub some more. Once the felt finished, rinse and squeeze out the excess water.
Some students were eager to take supplies home to continue felting. As we had enough material for each student to make two pieces of felt, they were encouraged to take a square of batt and as many small pieces to embellish their design as they can use. Add a small amount of mild dishsoap to hot tap water, then squirt into the ziploc bag. I avoid harsh grease-cutting detergent as they strip the natural oils from the wool.

Students always ask ” how do I know when I’m done?” There should be color migration from front to back (bits of the surface color will be visible peeking through the background color). When you pinch the felt between your fingers, can you feel fibers slipping and sliding? If the answer is yes, the fibers have not fully bonded and the felt is not done. Can you pull, tear or stretch the felt? If yes, then you’re not done. A finished piece of felt will be solid and firm. You can cut it without the edges fraying and you should not be able to stretch it (unless there is a thin spot with not enough roving). The wool will felt fastest with hot water and vigorous agitation. If you’ve rinsed the felt, then decided it isn’t quite done, add some hot soapy water then rub some more. Scrunching the felt into a ball and rubbing it between your palms will work well once the the surface design is fully adhered to the background.

Merino batts can be purchased from Opulent Fibers, and New England Felting Supply; prefelt sampler packs are available through Outback Fibers. If students are interested in further exploring wetfelting, the next step would be to play with roving. Available locally at my studio or at Weaving Works, there are many different fibers sold as roving. Each breed has different qualities and properties when felted. Merino will create the smoothest and fastest felt, but is also the most expensive roving made from sheep’s wool. Corriedale and romney are also common, but they are a coarser wool, better suited to needlefelting, at least for beginners.
Recommended reading: The Art of Feltmaking by Anne Einset-Vickrey
Week 7: Sewing and Spinning
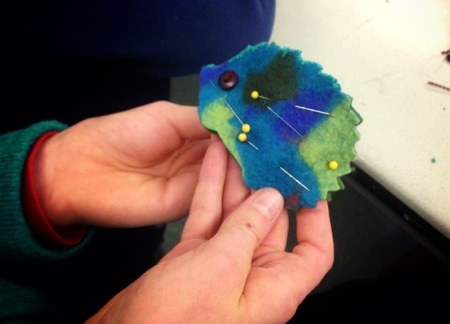
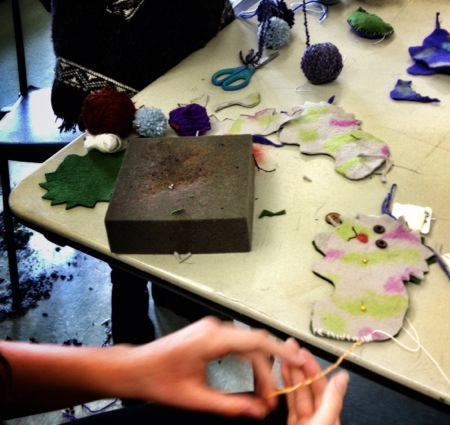
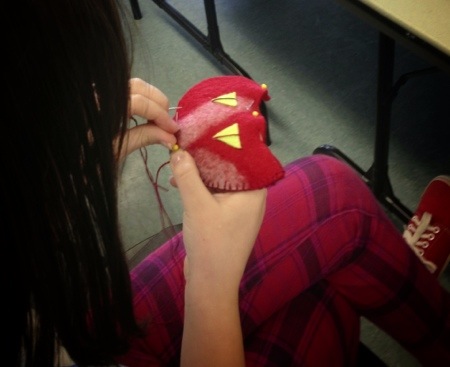
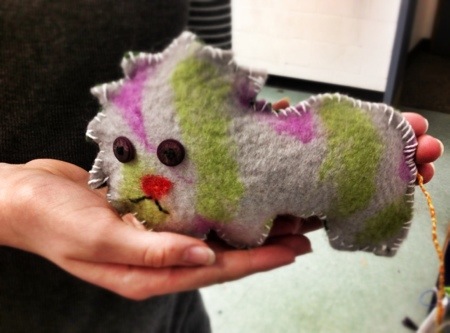
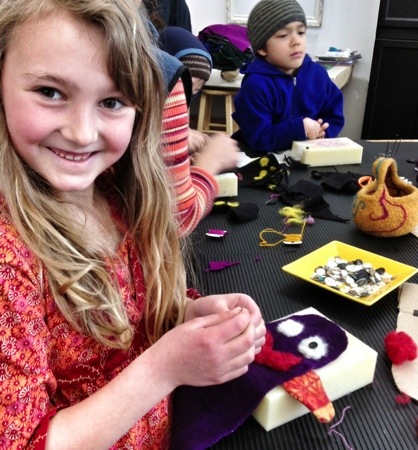
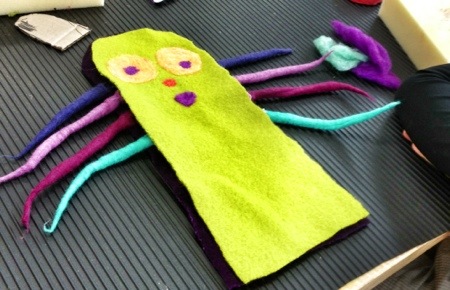
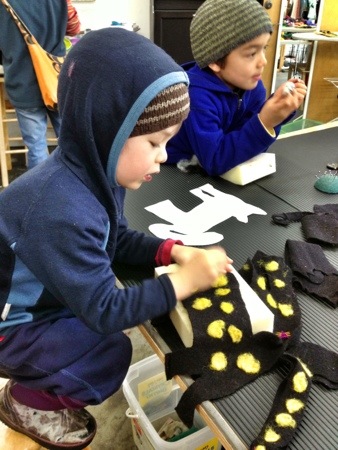
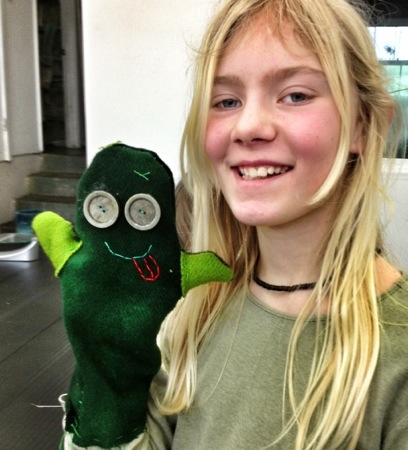
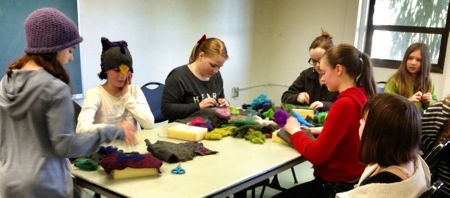
 Picking up the handsewing component of our class once again, we worked on transforming the pieces we wetfelted last week into sachets or pillows. I demonstrated a blanket stitch as a classic way to bind two fabrics together.
Some students chose to cut an interesting detail out of their handmade felt, then cut an identical piece of industrial felt to stitch the two together. I brought lavender, rice, lentils and catnip for stuffing. For those who want to create a larger pilow, I will bring fluffy wool batting to stuff next week.
Threading needles continues to be the most challenging aspect of handsewing. Working with large-eye needles will reduce frustration. There are needles available with a notch cut in the top of the eye so thread or yarn can be dropped into place instead of threaded through the eye. Students can competently whip stitch, blanket stitch and straight stitch through a variety of fabrics.


While the sewing was happening on one side of the classroom, some students were learning how to spin with a drop spindle. Our volunteer teaching assistant, Karen and another friend, Marti, stepped in with their spindles and made spinning skills to demonstrate. Drop spindles are a more portable version of the spinning wheel, operating on the same principle.

This is a skill that requires a little individual instruction and then plenty of practice. The Fiber Gallery hosts a monthly spinning circle on the first Friday of every month from 6:30-9pm. Bring your own spindle.
Next week we will have six spindles available for students, but we need a couple of volunteer instructors. If you have a spinning neighbor, aunt, grandparent or friend available for an hour next Friday morning, it would be wonderful to have them share their passion with our class.
If your student would like to own their own drop spindle, Weaving Works and the Fiber Gallery both carry a selection of handturned spindles. You can also search Etsy for drop-spindle kits which include wool, instructions, a spindle.
Week 8: Wetfelting Jellyroll Beads
Working with wool roving for the third time during this session, I introduced another preparation so the students can see firsthand how much variation there is in rovings. For this project, we worked with merino top, which has been processed three times, compared to the merino batt we used for the flat felt in Week 6 (carded once) and New Zealand corriedale sliver (carded twice) we used to needlefelt the pumpkins in Week 5. The merino top is very fine and smooth; all of the fibers are aligned and the shortest fibers have been removed.

Students selected three sections of merino in different colors, then drafted small sheets into an aluminum pan, creating a striated stack. Just like preparing sushi, students rolled their stack of wool tightly into a cylinder. With a drizzle of soapy water in their pan, they rolled the cylinder of fluffy wool gently, being careful not to saturate the wool all at once. Over time, they increased the pressure on the cylinder until it was time to put all their strength into compressing the last bit of wool into felt.
Working on a non-slip, textured surface will help in the final stages of felting. We unrolled a couple of foam mats from the corner of the classroom so the students could finish their rolls. At my studio, I work on a corrugated vinyl mat from the flooring department of your local home improvement store. I place the mat on a square of shelf/drawer liner also sold in home improvement stores to keep your dishes or silverware trays from sliding around. When the cylinders were firm and dense, we rinsed out all the soap, then squeezed out the excess water.

The best part of the process is always the cutting. What will the beads look like on the inside? Some thought the patterns resembled letters, others, candy and some peacock feathers. This is a quick project once you get the hang of it. There are kits in my Etsy shop with instructions and roving for felting more jellyroll beads. They can be strung together for a garland or a necklace.
Recommended reading: Hand Felted Jewelry and Beads by Carol Huber Cypher
Week 9: Pompoms, Tassels, Kumihimo
For our last week together, we worked on a couple new skills then pulled them all together with a small sewing project: felt gnomes. The pattern for the gnomes can be found in Freya Jaffke’s classic Waldorf book Toymaking with Children. Using several different types of wool yarn, we made pompoms and tassels, using our fingers and scissors as our only tools. Many craft supply stores sell plastic pom-pom makers, but it is a very simple process. Vicky Howell has a great tutorial on her crafty how-to YouTube channel. Fluffy and/or fuzzy yarns make the best pom-poms, while smooth and silky yarns make the best tassels.


Freya Jaffke’s pattern calls for a single seam along the hood, and then a running stitch around the base of the hood. The gnomes were stuffed with a little wool batting. Some of the students opted to sew a tiny bell to the hood. With a little yarn strung through the hood, these gnomes would make sweet tree decorations or door charms.

Lastly, I introduced Kumihimo, a seven-strand Japanese braid, as a way for students to complete some of the projects we started earlier in the session. Depending on the weight of the yarn and the fiber used, this technique can be employed to create a very sturdy rope or a fine cord. It can be sewn along the edge of a pillow as piping, used as a strap for a quiver of arrows or tied around a wrist for a friendship bracelet. The possibilities are endless.

The kumihimo discs were made with matte board. The slots will bend and wear out over time. To recreate your own disc, cut a square of stiff cardboard. On each side, measure and mark 1/4, and 3/4 of the width. Cut the corners between the 1/4 and 3/4 mark. This will create an octagon. Cut a slit halfway through each side, and poke a hole through the center with an awl. Cut seven lengths of yarn or cotton cord; pull the seven strands through the hole and knot together. Slip one piece of yarn through seven of the slots. From the empty slot, count 1…2…3. Pull the 3rd strand out of the slot and place it in the empty slot. Rotate the disc so the empty slot is now in front of you and count again 1…2…3. Make sure you are always working in the same direction (it doesn’t matter which) or you will undo the braid.

Thanks to the helpful hands of Sara Cole and Kelly Rogers Flynt, who took over in my stead while the students got to work, several more students took a turn with the drop-spindle. Many thanks to Jennifer Schuster for loaning me several of her fine spindles for our use during class.
Recommended reading: Toymaking with Children by Freya Jaffke

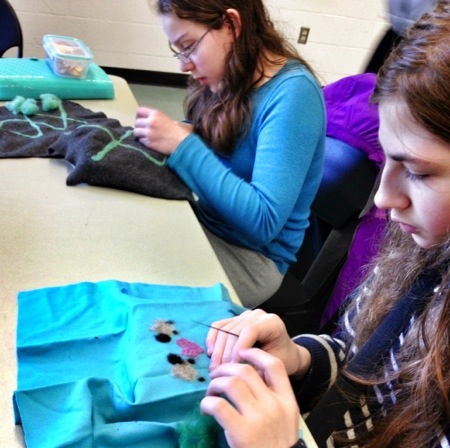
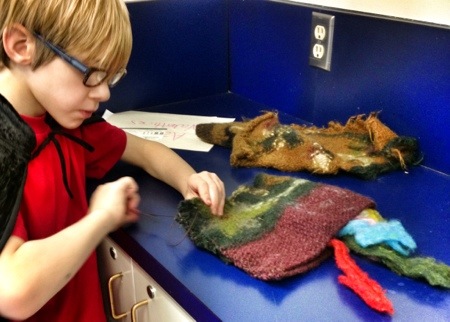
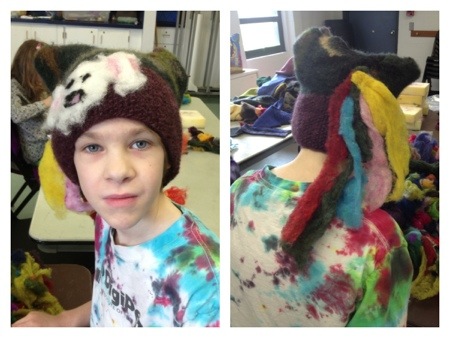
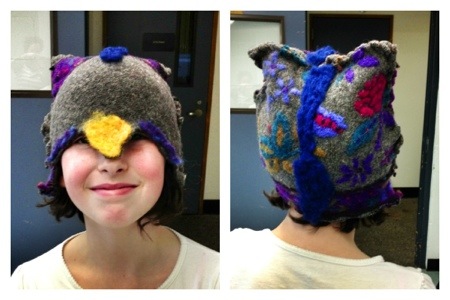



 Picking up the handsewing component of our class once again, we worked on transforming the pieces we wetfelted last week into sachets or pillows. I demonstrated a blanket stitch as a classic way to bind two fabrics together.


You must be logged in to post a comment.