Archive for the 'sewing' Category

Felt LED Superhero Cuff

As a bonus project, I created a kit for my fiber arts students to take home after our last class together. This activity takes a little more focus and attention than I can offer in a classroom setting, but it is the perfect activity for an adult and student to tackle together.

photo 3

The basic instructions for sewing together the components LED cuff were written by Fay of Bitwise E-Textiles.

photo 4

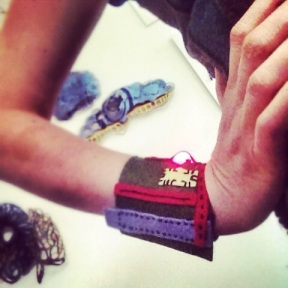
The primary difference between my cuff and Fay’s is the placement of the LED. After sewing the cuff exactly as she specified in her instructions, I cut a small slit in the felt and popped the LED through to the decorated side of the cuff. In the photo, you can see the round legs of the LED, but the bulb is behind the strip of red felt with the two black squares at the top.

photo 1

This cuff is a little snug for my wrist. I would recommend sewing the snaps a little closer to the edge if you want it to fit around a muscular arm. The circuit is only connected when the snaps are buttoned. Only one snap is sewn to the LED, so it is possible to wear the cuff without activating the battery and light.

photo 2

Power on! Summer’s almost here!


Felt a Monster, Sew a Puppet

20140310-194130.jpg

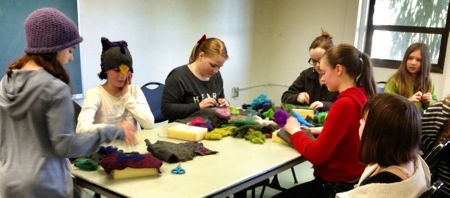
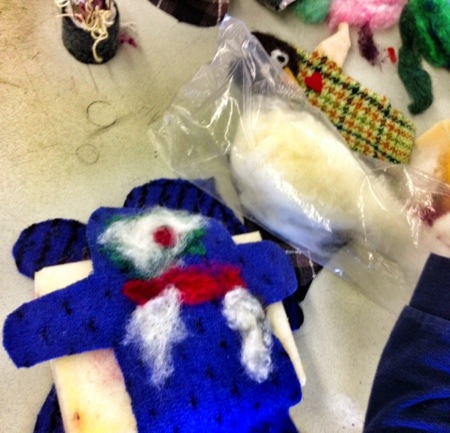
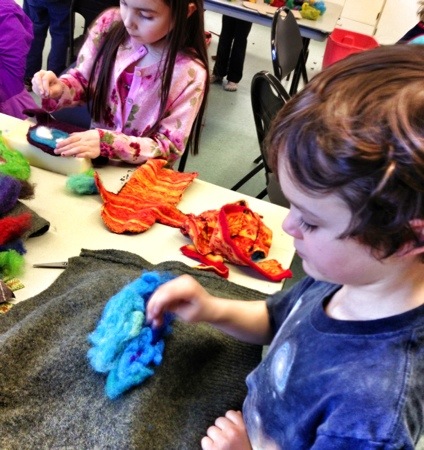
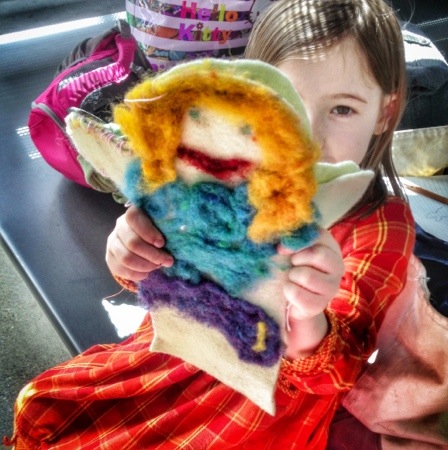
Our studio fiber class continued the puppet madness. Students needlefelted faces on pieces of felt cut from a fulled blanket I thrifted two weeks ago.

20140310-183650.jpg

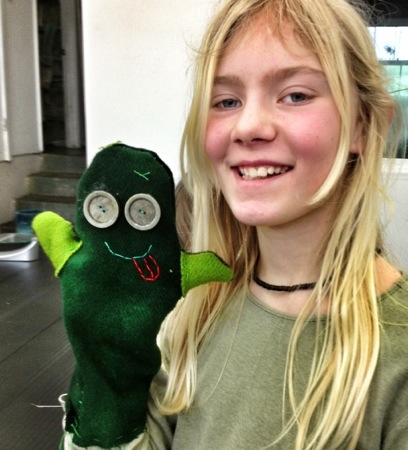
After the details are put in place, the front and back are whipstitched together. This puppet has tiny black button eyes and contrasting patterned arms.

20140310-183708.jpg

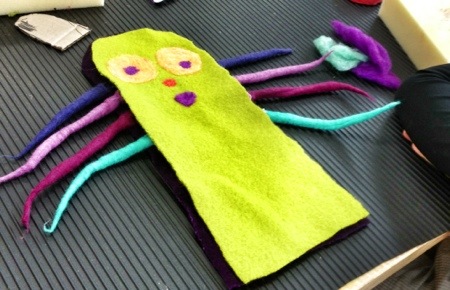
This octopus puppet with felt dread tentacles is just about ready to be sewn.

20140310-183719.jpg

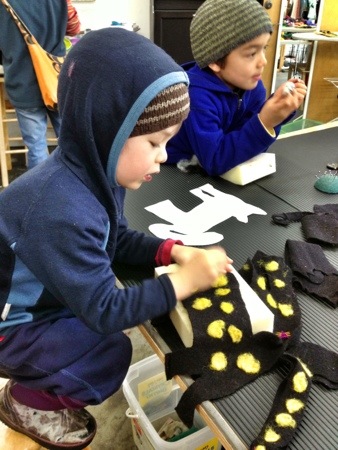
A reverse black cheetah gets his last yellow spots.

20140310-183731.jpg

Button eyes and embroidered features bring this puppet to life.


Upcycled Felt Wearables

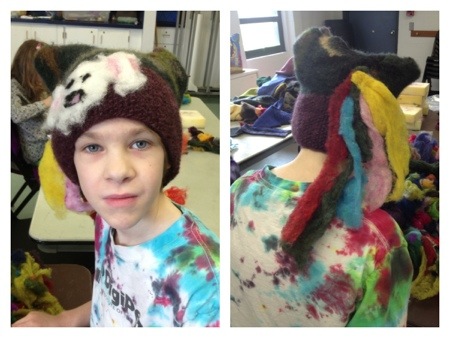
Today I brought a mixed tub of fulled wool fabric and a tub of wool roving for students to transform into accessories: hats, arm warmers and headbands.

20140228-150831.jpg

Before I get any further, I need to pull out my soap box to make a clarification. The handknit wool sweater thrown in the washing machine that emerges half the size it was before washing has been fulled, not felted.

When wool is spun into yarn, then knit (or woven or crocheted) into a new fabric and subsequently shrunk through vigorous agitation in hot soap and water, this is fulling. When unspun wool, also known as roving, is transformed into a solid fabric through vigorous agitation with hot soap and water, this process is called felting. As there is water involved, it is called wetfelting. Poking roving into a base fabric with a felting needle is a third technique called needlefelting, or sometimes dry felting.

When a friend brought in a whole bunch of sweaters she was no longer wearing, I cut them apart at the seams, tossed them in a couple lingerie bags and washed them in my top-loading washing machine in hot water with the dial turned to ‘heavy agitation’. Cutting a garment into pieces allows the fabrics to shrink more evenly. Sweaters fulled as an intact garment often have sections near armpits and neckline where they have not shrunk as much as the broad expanse of front and back.

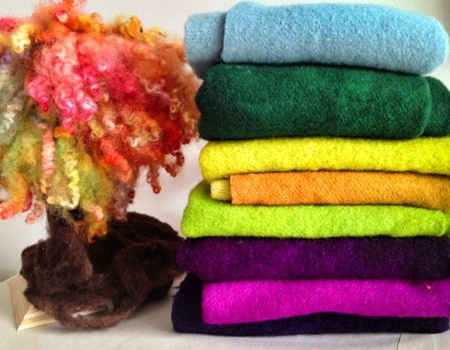
Once a sweater has been fulled, and the fabric is ready to be put to another use, it is called recycled felt or upcycled felt. This distinguishes the fabric from industrial craft felt, or felt created through wetfelting wool roving.

burningtree_orange.jpg

Recycled felt is a perfect base for embellishing by needlefelting roving into the surface. The bond made with felting needles is not permanent, as it is when fibers intermingle during wetfelting. In order for the roving to stay firmly attached to the fabric, it must be poked repeatedly. This can be time consuming and tedious, but it is important if students want their designs to last. I recommend using a Clover multi-needle tool to finish a design once all the elements are in place.

20140228-150847.jpg

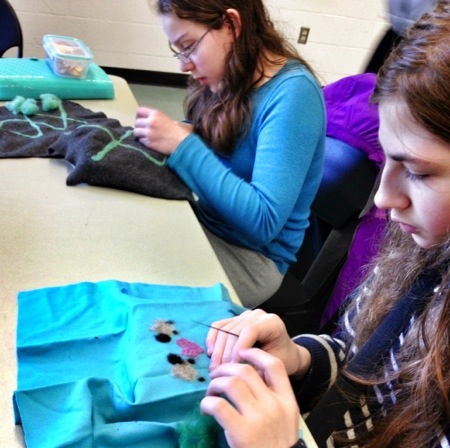
These two students spent the entire class needlefelting their designs. They were working with larger pieces of fabric. It will be interesting to see what they do with them next week.

20140228-151235.jpg20140318-215917.jpg

There’s a sheep with a rainbow tail hiding on the inside of this hat. Whipstitching seams can take a little time, but it will prevent the seams from coming undone over time.

20140228-150907.jpg

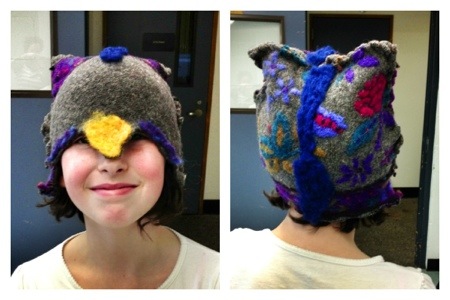
This student selected some upcycled felt with a colorful motif embroidered in the wool before it was fulled. Her two pieces of fabric once needlefelted and seamed made a fantastic bird hat.

20140228-150916.jpg

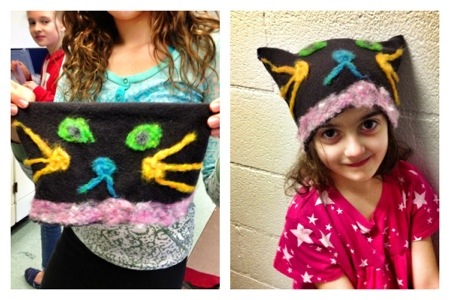
This student needlefelted cat eyes, nose and whiskers on two rectangles of fabric before sewing it into a hat for her little sister. By sewing two rectangles of fabric together, the peaks naturally form pointed ears. How lucky they are to have each other.

Needlefelting Puppet Faces

This week, students in both of my Family Learning Program clases began a project that will span two weeks.

20140228-151115.jpg

Using recycled or upcycled wool fabric harvested from fulled sweaters as their base, these students needlefelted Harrisville wool to create features for puppets. Harrisville is an ideal wool for needlefelting because it has lots of crimp and the fibers are not aligned, as in many rovings sold as a sliver. It also comes in a wide array of colors and can be quickly blended with your fingertips to create even more combinations.

20140228-151128.jpg

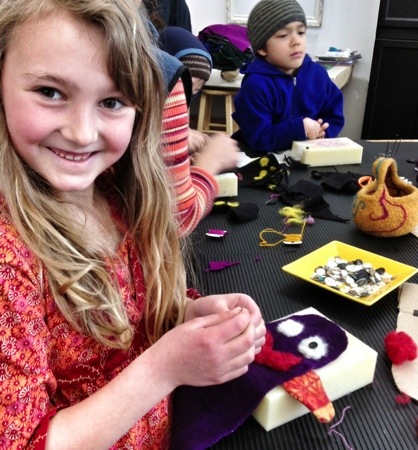
The students traced a cardboard outline onto two pieces of fulled wool, then cut along the contour lines. Next, they worked on adding faces to one piece of felt. This student is making a cyclops with a red mouth and fangs.

20140228-151136.jpg

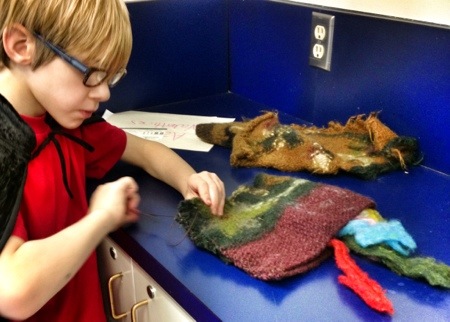
This student preferred to be the set decorator, creating backgrounds for the puppets he overhead various students describing. The mixed blues were going to be an ocean for another’s mermaid. He offered to make a tree for my sample owl puppet and a cave for the cyclops.

20140318-221905.jpg

Adding surface embellishment to fulled fabric is an easy introduction to felting for young children. Working on a foam pad, they can keep track of where their fingers are, reducing the chance of accidental puncture or snapped needles. The best part for many children is the ultimate flexibility of the method. Don’t like that eye placement? Rip it off and put it somewhere else. Don’t like that color? Rip it off and choose another. Can you think of another medium better suited for those paralyzed by commitment anxiety? This is also a perfect way to allow children to experiment with color and texture.

Braiding Tails

Friday marked the beginning of the Family Learning Program’s winter session. We have a bustling class of 12 students this semester. To start, I read Henry The Dog With No Tail by Kate and Jules Feiffer. My daughter noticed that Jules is also the illustrator of the Phantom Tollbooth, and that Henry is based on a real Australian Shepherd, a breed without tails. This was the jumping off point for our project.

20140111-151549.jpg

Rug braiding has a venerable tradition dating back to a time when fabric was costly and time consuming to weave. Worn out clothes were torn into strips and braided into rugs. Our project introduced the basic elements of this process. My husband’s grandmother braided the hearth rug in this photo. When we moved from New Hampshire in 2003, I was fortunate to bring with us a tub of wool fabric torn into strips, ready to braid. It has been sitting in storage, waiting for a project like this. I imagine that Cecile would be thrilled to see so many eager hands learning with her fabric.

20140111-151534.jpg

The students sewed three pairs of strips, overlapping the ends, using heavy upholstery thread. We were fortunate to have several helpful parents in class to assist with threading needles, stitching and tying off knots. Once they had three long strips, students learned how to braid them together. Working in pairs, they took turns holding or braiding their strips. At the end of the first class, most students had finished sewing the strips of fabric, braiding and tying a ribbon around each end.

We meet for one hour, once a week. Considering our class size and the age of our students, one hour is a very long time and a very short time. It is hard to work on a project for an entire hour, and it is also difficult to help everyone get to the same point within that hour. There were six parents assisting in our class to give an idea of our student/teacher ratio.

When we met the following week, the students sewed several buttons  to a length of ribbon. Parents cut button holes in the ribbon and then helped the students sew their braided tails to the back of the ribbon. Sewing buttons was very challenging for the students. Many were frustrated by the complexity of holding the ribbon and locating the correct hole in the button. We will practice this skill again later in our session.


20140122-165323.jpg

Despite the frustrations in the moment, the students were thrilled with their new tails. They were swishing and swaying all over the classroom.

To reinforce the idea of re-purposing worn fabric, one of the parents read Something From Nothing by Phoebe Gilman while we stitched. Another version of this story is Joseph Had A Little Overcoat by Simms Taback.

Handsewing and Fiber Arts 8-13 yrs

This post is intended as an archive of the projects created in the fiber arts class I designed for the Family Learning Program. Taught weekly at the Southwest Teen Life Center in West Seattle, the Family Learning Program was established to provide curriculum enrichment to homeschool families.

Week 1: Embroidery

nametag

Our first week started with an exercise in simple embroidery on recycled wool fabric and pieces cut from a fulled wool blanket to create nametags. Students embroidered their names on the off-white blanket fabric using a blunt needle and wool tapestry yarn. After selecting wool fabric, they sewed a pinback to one piece. Next, we cut out interfacing, and ironed it between two pieces of wool fabric to create additional stability. The last step was adhering the embroidered blanket fabric to the stiffened wool fabric using another piece of interfacing.

As some students were still working on their embroidery when class ended, they either chose to continue working on them at home, or left them with me to complete in week 2.

Recommended reading: Kids’ Embroidery by Kristin Nicholas

Week 2: Sewing

needlekeeper_anna

In the second week, students stitched needlekeepers out of manufactured wool felt. Closures were braided out of yarn, or sewn with buttons to the felt. Students were encouraged to embellish or decorate the felt with embroidery stitches or buttons.

Felt sheets sold in fabric stores are either acrylic, a bamboo blend or wool. Acrylic felt is the least expensive, has a slightly squeaky feel when rubbed between your fingers, and is a little more difficult to sew than 100% wool felt.

Upcycled or recycled felt fabric can be created by deliberately shrinking a loosely woven or knit fabric (blanket, skirt, sweater) in the wash. This process is known as fulling. Pendleton blankets and shirts are made from fulled wool yardage. Fabric and craft stores sell pre-cut, packaged shapes harvested from recycled fabric. There are many craft books with simple stitching, sewing and embroidery projects made with felt. Cutting up an accidentally fulled sweater is a great way to get the fabric required to start one of these projects.

needlekeeper_sampel

Recommended reading: Warm Fuzzies: 30 Sweet Felted Projects by Betz White; Stash Happy: Felt: 30 Fun Projects for Felt (and Fabric) Lovers by Amanda Carestio; Super-Cute Felt: 35 Step-By-Step Projects to Make and Give by Laura Howard

Week 3: Needlepoint

needlepoint_sampleIn the third week, we worked on needlepoint using rigid plastic grids. Students were shown how to do the simplest over-under-over stitch, which leaves some of the plastic grid visible. They also were shown how to do the traditional needlepoint stitch, passing through a square twice (once going up a column, and once going down a column). This covers the grid in a dense pattern of diagonal stitches. Several colors of yarn can be used in a single piece, carrying the yarn across the back between sections.

During class, I noticed one student creating a spiral pattern, similar to a spiderweb and another student crossing four columns of squares for an elongated diagonal stitch.

To further explore this idea, plastic grids are sold in 10″ x 13″ sheets at craft stores. Cut a grid into six pieces, fill each grid with needlepoint and then stitch them together to create a box or a tote.

We used wool yarn for this project as it will expand to fill the gaps between the grid lines nicely, but needlepoint is typically done with either wool tapestry yarn, cotton or silk floss. Separate the strands for fine color work.

needlepoint_cy needlepoint_margot

For students ready for a further challenge, try stitching on gingham fabric, using the colored grid as a guide or move on to traditional needlepoint fabric which has a fine grid built into the weave. Draw a pattern on the fabric with colored markers, then follow the color changes with the floss. Some people find it is easier to handle fabric when held taught by an embroidery hoop, but this can be cumbersome and more difficult for some hands to manage. We started with plastic grids so students could focus on their stitching instead of worrying about keeping the fabric stable.

Week 4: Weaving

For students ready for a further challenge, try stitching on gingham fabric, using the colored grid as a guide or move on to traditional needlepoint fabric which has a fine grid built into the weave. Draw a pattern on the fabric with colored markers, then follow the color changes with the floss. Some people find it is easier to handle fabric when held taught by an embroidery hoop, but this can be cumbersome and more difficult for some hands to manage. We started with plastic grids so students could focus on their stitching instead of worrying about keeping the fabric stable.

cardboard_weavingcardboard_weaving2

Weaving just a few rows of the warp with one color and the the rest of the warp with another color for a few rows will create an opening that can become a buttonhole. The buttonhole should be followed up with several rows of dense weaving across the entire width of the loom to close the gap.

Try adding dried grasses or lavender to the woven piece. Feathers and flowers can be added to a section. This preschool teacher created a beautiful woven roof for a backyard playhouse using materials harvested on their nature walks.

Recommended reading: Kids’ Weaving by Sarah Swett

Week 5: Needlefelting

In week 5, students needlefelted pumpkins and creatures using wool roving. Needlefelting is ideal for creating soft sculpture and adding surface embellishment to many fabrics. Layers of wool can be added to create dimension, in the same way a sculptor would add small bits of clay to create a nose, brow and cheek ridges on a face. Individual fibers are poked together without creating a permanent bond. This is both a blessing and a curse. Should the artist decide they don’t like the way an ear is perched on their squirrel, it can be easily removed and repositioned. It also means that Fido will likely tear the felt squirrel to bits the first time it is left unattended.

Surface designs can be needle felted easily to wool felt; many craft books suggest creating custom pillows with needlefelted designs. Because the wool is only poked into place with the needles, the design will pill over time and may rub away if it is in a high-traffic spot. To afix the design permanently, it should be washed with hot water (either by hand or in the machine). We will explore wetfelting in the coming weeks.

The needle tips are fragile, so should be used with care and with adult supervision. Used correctly, in a vertical poking direction (as opposed to poke and twist or aggressive stabbing), needles should last many years.

pumpkin

The type of roving we used was from Corriedale sheep; it had been washed, dyed and ironed to straighten the fibers. A general rule of thumb when evaluating roving is to look for a coarse wool with lots of texture. The felting needles will grab a coarse wool more easily than a fine wool.

20131110-111932.jpg

One of the younger students in the class made a pair of bumblebees, a pair of ladybugs and several more creations from her imagination.

Single felting needles are sold in several gauges, from 36-42, rated for the coarseness of the fiber. We used the medium gauge size 38 needle. Clover makes a spring-loaded multi-needle tool which is useful when finishing a large design to tamp it down. In the background of this photo, there is a handmade multi-needle tool I bought from Moxie, a Seattle artist. The multi-tools are much more likely to result in unintentional finger stabbing. With a little coordination, using two single needles held together in one hand can be an efficient way to speed up the process, but I still return to a single needle when working to get a small detail fixed in place.

You can buy needles and wool roving at Weaving Works on Brooklyn Ave in the University District. I also sell needles, roving and felting kits through my studio and Etsy shop: http://kneek.etsy.com.

The Japanese bookstore Kinokuniya, located inside the International District Uwajimaya has many small books full of inspiring projects: pastry, cartoon characters, novelty foods. While the instructions are written in Japanese, the illustrations are sufficient to guide you through many projects.

Recommended reading: Wool Pets by Laurie Sharp; Felted Feathered Friends by Laurie Sharp; Little Felted Animals by Marie-Noelle Horvath.

Week 6: Wetfelting

We jumped into my favorite subject this week: making felt from wool. I showed the students raw wool in the grease, and the same locks once washed. Then I demonstrated how the locks are turned into batt using hand carders.

20131102-101810.jpg

Next we laid out small pieces of merino batt on 10″ squares of batt I had previously cut. Dyed locks, yarn and small pieces of pre-felt were also available as additional embellishments. I chose to use batt to minimize the difficulties beginning students have with drafting fine layers of roving.

Once the design was complete, we placed them on a 12″ square of bubble wrap, then slipped the batts into a ziploc bag, squirted in some warm soapy water, then sealed. We started by tapping the bags with our fingers and then pounding the bags with our fists. At this first stage, the designs are fragile. Details may move around if agitation is too vigorous. Tapping is a way to agitate the wool without disturbing the design. After three or four minutes of tapping, open the bag, and peek at the wool. Is there a sharp delineation between the surface design and the background? If yes, then the design is still fragile and should be tapped or pounded longer. Can you see the small fibers migrating into the base? If yes, then the design is felting well and you can work more vigorously. Seal the bag again, then rub the wool around on the bubble wrap. After ten minutes of vigorous agitation, open the bags again. As the wool transitions to felt, it will start to shrink. The edges may fold over on themselves, but they can be peeled away and straightened along the way. Pour a little more hot water on the felt, then rub some more. Once the felt finished, rinse and squeeze out the excess water.

Some students were eager to take supplies home to continue felting. As we had enough material for each student to make two pieces of felt, they were encouraged to take a square of batt and as many small pieces to embellish their design as they can use. Add a small amount of mild dishsoap to hot tap water, then squirt into the ziploc bag. I avoid harsh grease-cutting detergent as they strip the natural oils from the wool.

20131103-173028.jpg

Students always ask ” how do I know when I’m done?” There should be color migration from front to back (bits of the surface color will be visible peeking through the background color). When you pinch the felt between your fingers, can you feel fibers slipping and sliding? If the answer is yes, the fibers have not fully bonded and the felt is not done. Can you pull, tear or stretch the felt? If yes, then you’re not done. A finished piece of felt will be solid and firm. You can cut it without the edges fraying and you should not be able to stretch it (unless there is a thin spot with not enough roving). The wool will felt fastest with hot water and vigorous agitation. If you’ve rinsed the felt, then decided it isn’t quite done, add some hot soapy water then rub some more. Scrunching the felt into a ball and rubbing it between your palms will work well once the the surface design is fully adhered to the background.

20131103-173013.jpg

Merino batts can be purchased from Opulent Fibers, and New England Felting Supply; prefelt sampler packs are available through Outback Fibers. If students are interested in further exploring wetfelting, the next step would be to play with roving. Available locally at my studio or at Weaving Works, there are many different fibers sold as roving. Each breed has different qualities and properties when felted. Merino will create the smoothest and fastest felt, but is also the most expensive roving made from sheep’s wool. Corriedale and romney are also common, but they are a coarser wool, better suited to needlefelting, at least for beginners.

Recommended reading: The Art of Feltmaking by Anne Einset-Vickrey

Week 7: Sewing and Spinning

20131110-112009.jpgPicking up the handsewing component of our class once again, we worked on transforming the pieces we wetfelted last week into sachets or pillows. I demonstrated a blanket stitch as a classic way to bind two fabrics together.

Some students chose to cut an interesting detail out of their handmade felt, then cut an identical piece of industrial felt to stitch the two together. I brought lavender, rice, lentils and catnip for stuffing. For those who want to create a larger pilow, I will bring fluffy wool batting to stuff next week.

Threading needles continues to be the most challenging aspect of handsewing. Working with large-eye needles will reduce frustration. There are needles available with a notch cut in the top of the eye so thread or yarn can be dropped into place instead of threaded through the eye. Students can competently whip stitch, blanket stitch and straight stitch through a variety of fabrics.

20131110-111951.jpg20131125-173144.jpg

While the sewing was happening on one side of the classroom, some students were learning how to spin with a drop spindle. Our volunteer teaching assistant, Karen and another friend, Marti, stepped in with their spindles and made spinning skills to demonstrate. Drop spindles are a more portable version of the spinning wheel, operating on the same principle.

20131110-111958.jpg

This is a skill that requires a little individual instruction and then plenty of practice. The Fiber Gallery hosts a monthly spinning circle on the first Friday of every month from 6:30-9pm. Bring your own spindle.

Next week we will have six spindles available for students, but we need a couple of volunteer instructors. If you have a spinning neighbor, aunt, grandparent or friend available for an hour next Friday morning, it would be wonderful to have them share their passion with our class.

If your student would like to own their own drop spindle, Weaving Works and the Fiber Gallery both carry a selection of handturned spindles. You can also search Etsy for drop-spindle kits which include wool, instructions, a spindle.

Week 8: Wetfelting Jellyroll Beads

Working with wool roving for the third time during this session, I introduced another preparation so the students can see firsthand how much variation there is in rovings. For this project, we worked with merino top, which has been processed three times, compared to the merino batt we used for the flat felt in Week 6 (carded once) and New Zealand corriedale sliver (carded twice) we used to needlefelt the pumpkins in Week 5.  The merino top is very fine and smooth; all of the fibers are aligned and the shortest fibers have been removed.

20131125-173215.jpg

Students selected three sections of merino in different colors, then drafted small sheets into an aluminum pan, creating a striated stack. Just like preparing sushi, students rolled their stack of wool tightly into a cylinder. With a drizzle of soapy water in their pan, they rolled the cylinder of fluffy wool gently, being careful not to saturate the wool all at once. Over time, they increased the pressure on the cylinder until it was time to put all their strength into compressing the last bit of wool into felt.

Working on a non-slip, textured surface will help in the final stages of felting. We unrolled a couple of foam mats from the corner of the classroom so the students could finish their rolls. At my studio, I work on a corrugated vinyl mat from the flooring department of your local home improvement store. I place the mat on a square of shelf/drawer liner also sold in home improvement stores to keep your dishes or silverware trays from sliding around. When the cylinders were firm and dense, we rinsed out all the soap, then squeezed out the excess water.

20131125-173242.jpg

The best part of the process is always the cutting. What will the beads look like on the inside? Some thought the patterns resembled letters, others, candy and some peacock feathers. This is a quick project once you get the hang of it. There are kits in my Etsy shop with instructions and roving for felting more jellyroll beads. They can be strung together for a garland or a necklace.

Recommended reading: Hand Felted Jewelry and Beads by Carol Huber Cypher

Week 9: Pompoms, Tassels, Kumihimo

For our last week together, we worked on a couple new skills then pulled them all together with a small sewing project: felt gnomes. The pattern for the gnomes can be found in Freya Jaffke’s classic Waldorf book Toymaking with Children. Using several different types of wool yarn, we made pompoms and tassels, using our fingers and scissors as our only tools. Many craft supply stores sell plastic pom-pom makers, but it is a very simple process. Vicky Howell has a great tutorial on her crafty how-to YouTube channel. Fluffy and/or fuzzy yarns make the best pom-poms, while smooth and silky yarns make the best tassels. 

20131125-173353.jpg20131125-173424.jpg

Freya Jaffke’s pattern calls for a single seam along the hood, and then a running stitch around the base of the hood. The gnomes were stuffed with a little wool batting. Some of the students opted to sew a tiny bell to the hood. With a little yarn strung through the hood, these gnomes would make sweet tree decorations or door charms.

20131125-173320.jpg

Lastly, I introduced Kumihimo, a seven-strand Japanese braid, as a way for students to complete some of the projects we started earlier in the session. Depending on the weight of the yarn and the fiber used, this technique can be employed to create a very sturdy rope or a fine cord. It can be sewn along the edge of a pillow as piping, used as a strap for a quiver of arrows or tied around a wrist for a friendship bracelet. The possibilities are endless.

20131125-173917.jpg

The kumihimo discs were made with matte board. The slots will bend and wear out over time. To recreate your own disc, cut a square of stiff cardboard. On each side, measure and mark 1/4, and 3/4 of the width. Cut the corners between the 1/4 and 3/4 mark. This will create an octagon. Cut a slit halfway through each side, and poke a hole through the center with an awl. Cut seven lengths of yarn or cotton cord; pull the seven strands through the hole and knot together. Slip one piece of yarn through seven of the slots. From the empty slot, count 1…2…3. Pull the 3rd strand out of the slot and place it in the empty slot. Rotate the disc so the empty slot is now in front of you and count again 1…2…3. Make sure you are always working in the same direction (it doesn’t matter which) or you will undo the braid.

20131125-173450.jpg

Thanks to the helpful hands of Sara Cole and Kelly Rogers Flynt, who took over in my stead while the students got to work, several more students took a turn with the drop-spindle. Many thanks to Jennifer Schuster for loaning me several of her fine spindles for our use during class.

Recommended reading: Toymaking with Children by Freya Jaffke
Handsewing and Fiber Arts 5-7 yrs

This post is intended as an archive of the projects created in the fiber arts class I designed for the Family Learning Program. Taught weekly at the Southwest Teen Life Center in West Seattle, the Family Learning Program was established to provide curriculum enrichment to homeschool families.

Week 1: Sewing

20131102-094144.jpg

We started our class with the most basic skills needed in a hand sewing class. Students practiced threading needles with yarn and embroidery floss, tying knots at the end of their thread and sewing buttons onto recycled wool felt.

Week 2: Sewing

younger_pouch

In week 2, students created pouches with buttons and handles.

20131102-094231.jpg

They worked with manufactured wool felt, sewing side seams, handles and buttons with wool tapestry yarn.

Week 3: Needlepoint

20131028-114938.jpg

In the third week, we worked on needlepoint using rigid plastic grids. Students were shown how to do the simplest over-under-over stitch, which leaves some of the plastic grid visible.

To further explore this idea, plastic grids are sold in 10″ x 13″ sheets at craft stores. Cut a grid into six pieces, fill each grid with needlepoint and then stitch them together to create a box or a tote.

20131102-094257.jpg

We used wool yarn for this project as it will expand to fill the gaps between the grid lines nicely, but needlepoint is typically done with either wool tapestry yarn, cotton or silk floss. Separate the strands for fine color work.

For students ready for a further challenge, try stitching on gingham fabric, using the colored grid as a guide or move on to traditional needlepoint fabric which has a fine grid built into the weave. Draw a pattern on the fabric with colored markers, then follow the color changes with the floss. Some people find it is easier to handle fabric when held taught by an embroidery hoop, but this can be cumbersome and more difficult for some hands to manage. We started with plastic grids so students could focus on their stitching instead of worrying about keeping the fabric stable.

Recommend reading: Kids’ Embroidery by Kristin Nicolas

Week 4: Weaving

paperweaving

Students wove strips of recycled maps through scored cards. Some students created an alternating basketweave pattern, while another wove the same over-under pattern for each strip. The basketweave creates a tight construction, while placing all strips in the same slots creates a pattern with more movement.

Recommended reading: Kids Weaving by Sarah Swett

Week 5: Kumihimo (Japanese Braiding)

20131028-115012.jpg

Working on a smaller scale, students replicated an ancient process used to create heavy cord and rope. Students plied a seven strand braid using a cardboard octagon disc. The finished braid can be used as a friendship bracelet, a strap or an ornament.

The kumihimo discs were made with matte board. The slots will bend and wear out over time. To recreate your own disc, cut a square of stiff cardboard. On each side, measure and mark 1/4, and 3/4 of the width. Cut the corners between the 1/4 and 3/4 mark. This will create an octagon. Cut a slit halfway through each side, and poke a hole through the center with an awl. Cut seven lengths of yarn or cotton cord; pull the seven strands through the hole and knot together. Slip one piece of yarn through seven of the slots. From the empty slot, count 1…2…3. Pull the 3rd strand out of the slot and place it in the empty slot. Rotate the disc so the empty slot is now in front of you and count again 1…2…3. Make sure you are always working in the same direction (it doesn’t matter which) or you will undo the braid.

I read Farmer Brown Shears His Sheep by Teri Sloat in which a farmer shears his sheep, then takes the wool to be washed, carded, dyed and spun into yarn so he can knit colorful sweaters for the sheep. The students love the whimsical illustrations.

Week 6: Wetfelting

We jumped into my favorite subject this week: making felt from wool. I showed the students raw wool in the grease, and the same locks once washed. Then I demonstrated how the locks are turned into batt using hand carders.

20131102-094355.jpg

Next we laid out small pieces of merino batt on 10″ squares of batt I had previously cut. Dyed locks, yarn and small pieces of pre-felt were also available as additional embellishments. I chose to use batt to minimize the difficulties young students have with drafting fine layers of roving.

20131102-094457.jpg

Once the design was complete, we placed them on a 12″ square of bubble wrap, then slipped the batts into a ziploc bag, squirted in some warm soapy water, then sealed. We pounded the bags with our hands, rubbed the wool around on the bubble wrap and stomped on the floor. After ten minutes of vigorous agitation, we opened the bags to see how the felt was progressing. We poured a little more hot water on the felt, then rubbed some more. Once I determined the felt was finished, we rinsed and squeezed out the excess water.

20131103-173122.jpg

With a few minutes left in the class, I read Noah’s Mittens by Lise Lunge-Larsen. It is the only picture book about felting I know. It is a clever story that describes the effect of heat and friction on sheep in close quarters and the felt that results. Caveat: as the author relies on the story of Noah’s ark as the springboard to describe the discovery of felt, there are several God references, which I didn’t have the forethought to edit as I was reading aloud.

Recommended reading: The Art of Feltmaking by Anne Einset-Vickrey

Week 7: Sewing and Spinning

We started the class reading Feeding the Sheep by Leda Schubert, a sweet sheep-to-sweater story where a child learns why her mother cares for her sheep.

20131110-124648.jpg

As an introduction to spinning, we twisted and then plied a short piece of yarn. While one student held the end of the roving, the other student twisted until it the wool started to twist back on itself. The process was repeated with a second piece of roving. Holding the two pieces of roving together in one hand, I released the potential energy coiled within and the two bits twisted around each other.

20131110-112053.jpg

The students worked on sewing lavender sachets, which can double as small pillows for their stuffies and dolls. Using small pieces of cotton fabric, I pinned two pieces together wrong sides out, then the students whip stitched them together with wool tapestry yarn.

20131110-112101.jpg

Once they were finished stitching on three sides, we flipped them so the right sides were facing out then filled them with a mixture of rice, lentils and lavender. One more seam along the open side finished them off.

Week 8: Wetfelting Jellyroll Beads

We worked on another felting project this week: jellyroll  beads. This project demonstrates just how firm and dense felt can become, despite starting with light and fluffy wool. Students selected three sections of merino roving in different colors, then drafted small sheets into an aluminum pan, creating a striated stack. Just like preparing sushi, students rolled their stack of wool tightly into a cylinder. With a drizzle of soapy water in their pan, they rolled the cylinder of fluffy wool gently, being careful not to saturate the wool all at once. Over time, they increased the pressure on the cylinder until it was time to put all their strength into compressing the last bit of wool into felt.

20131125-173559.jpg

As we were working on plastic folding tables, it was difficult to get any traction on the surface. The cylinders did a lot of slipping and not much rolling. Working on a non-slip, textured surface will help in the final stages of felting. As I neglected to bring them in, I took the students’ felt logs back to the studio to finish. We will cut the beads next week.

At my studio, I work on a corrugated vinyl mat from the flooring department of your local home improvement store. I place the mat on a square of shelf/drawer liner also sold in home improvement stores to keep your dishes or silverware trays from sliding around. When the cylinders were firm and dense, I rinse out all the soap, then squeeze out the excess water.

Karen read Sophie’s Masterpiece by Eileen Spinelli while we worked on the jellyroll beads.

Week 9: Sewing Gnomes

In our last week together, we cut our felt jellyroll beads from last week and sewed tiny felt gnomes using industrial wool felt, carded wool batting, wool tapestry yarn and tiny bells. The pattern is from Freya Jaffke’s classic Waldorf book: Toymaking with Children.

20131125-173629.jpg

These gnomes would make sweet little ornaments for a doorknob or tree. The pattern calls for a single row of whip stitch along the hoodline and a slip stitch around the collar. The finished gnomes are stuffed with wool batting.

20131125-173706.jpg20131125-173742.jpg

One student brought her felt purse from Week 2. It was the perfect way to take home her felt gnome and jellyroll beads. I sense a color theme working through this student’s work.

There was just enough time at the end of class to read Woolbur by Leslie Helakoski.

Handmade Felt vs. Industrial Felt Yardage

I love felt boxes. They appeal to my instinct to sort, collect and organize and they satisfy my desire to fill my world with color. One of the first felt projects I tried was turning a piece of flat felt into a box using some bits and scraps of color I picked up in a fiber medley package. Since then I’ve made many, many, many boxes in different shapes and sizes for myself and for custom orders. I love working with the heathered colors of Harrisville Designs to create infinite combinations. The best suggestions come from customers who suggest pairing colors outside of my normal habits.

Despite my love of this product, there is no getting around the fact that it is both labor intensive and not profitable. There is something so satisfying about seeing sets of boxes stacked in a row. Then I calculate the time put into the task, close to two hours per box,  and the back aches that come from working the felt until it is really rigid, which limit the number I can produce in a day. Realistically, I can’t continue selling them for $25 per box. And if I was a customer looking for a box, would I spend that much money for storage? I don’t think so.

This led me to wonder whether sewing the boxes out of industrial felt was a viable alternative. I looked up felt suppliers on Etsy then bought a yard of teal 3mm felt from a Canadian seller to the tune of $80/yd.

Could I make boxes that reflected my aesthetic using something that looked as flat as a pool table?

My first experiments have been a qualified success. I like the look, but these three boxes didn’t exactly jump off the table, and the felt was dear. The sewing machine I use, an early ’80s Kenmore hand-me-down from my mother, does not like sewing through 6mm of felt. It grinds, then gets stuck, then lurches forward a couple of stitches and then stops. Either this puppy needs a tune-up, or I need a cobbler’s sewing machine. The jury is still out on this one. In case my husband’s poker friends are wondering whether I’ve ripped up someone’s pool table, that is 3/4 of a yard of industrial felt waiting for me to decide just what to do with it.

PS. I read an article on pricing handmade items just minutes after publishing this post. With a little bird sitting on my shoulder, I relisted my soft felt box, handmade and handfelted to be durable and brighten your home, at a price that reflects the amount of work it takes to make them.

Felt Plants on a Blanket

Last year, several intermediate teachers planted a native garden on the west side of our school, after much planning, grant-writing, research, design, digging and prepping by students, staff and parents. The teachers integrated the work into the curriculum on many levels. The children took ownership and intense pride in the project.

To further extend the learning the following year, my daughter’s teacher suggested the students transform sketches in their science journals into a felted illustration. One of our school’s strengths lies in seeing how students learn through multiple media. Illustrating a plant on paper and then working it in felt allows a student to see a plant again and again through different lenses.

Each spring, our school holds a large auction to augment insufficient school district funds, paying for half our librarian, PE teacher and art teacher salaries. Each class contributes a collaborative creation for the live auction; these works of art are usually the most popular items.  In the past, artists have worked with the students to create mosaic planters, a fused glass tile installation, watercolor paintings and photo collages. This year, I volunteered to turn the needlefelt illustrations of the native garden into two afghans.

Starting with a box of recycled felt culled from fulled sweaters, the students designed their pieces paying attention to the shape of the leaves, flowers and the gesture of the plant. They worked on blending the corriedale fibers to create a broad color palette. A team of four parents worked with our class of twenty-eight nine and ten year old students for six periods to needle their designs. The students were asked to complete three pieces: two panels for our blankets and one to keep.  Several students finished six designs, then volunteered to tamp down the work completed by their classmates. After thoroughly needling each piece, the completed designs were fulled one more time in the washing machine.

Next, I worked with another parent to arrange the pieces, paying close attention to color and style. We separated those pieces worked on heavier wool felt from those worked on finer merino and cashmere; there were enough to make a large blanket with the heavy pieces and a smaller throw with the lighter pieces. We basted the heavy pieces to three yards of wool suiting bought at the fabric store.

With one week left before the auction, it was apparent just how much work remained to finish the two afghans. In swooped my mother to save the day. She took the largest blanket back to Vancouver, where she worked on it with her heavy-duty sewing machine. She stitched each piece to the wool backing, using a decorative quilting stitch, then drove it back to Seattle the day before I had to hand it in, giving the kids a chance to see their handiwork assembled in its final form.

Meanwhile, I pieced and patched the smaller throw, sewing the cashmere pieces to each other using a zigzag stitch. I owe a huge debt of gratitude to Heidi of Haute Goat for her expertise and helpful consultation, not to mention her walking foot.

In the end, the pieces sold for $1250 and $650 at the auction, purchased by two parents in our classroom. Thanks to to the parents who generously donated their sweaters to the cause and to Mary Jo Dawe, Renee Derby, Edith Fuchs, and Sarah Kopf-Patterson for their blood, sweat and tears.

Wrap it Up and Roll it Out: Recycled Felt Pencil Roll-Up

One of the things I like to do with each sale in my etsy shop is include a small handmade card. Typically it is a little leaf, colored then painted with watercolor pencil crayons. It adds a little bit of time to the packaging, but I enjoy receiving a note when I buy something handmade, so it seems I should return the favor. Every buyer deserves to feel like they have bought themselves a gift, right?

However, there is no getting around the fact that towards the end of November, when time is in short supply, it would be handy to have a bunch of cards made in advance. As I prepared to leave my house, packing up my pencil crayons and cards seemed like a project I could bring with me to the cabin.

pencil_roll_sm

The only problem was how to keep all the pencils together and still make them available. Inspired by a knitting needle keeper I’d seen a few years previous, I sewed a pencil keeper out of recycled wool sweaters. The striped ribbing keeps the pencils in place when I’m carrying the bundle rolled up.

pencil_roll_up_sm

One of my knitting friends gave me a lovely olive green sweater that was machine knit side to side. It had an interesting construction that I was able to use to my advantage. I sewed some twill tape into the seam and then threaded it through a button hole to wrap around the bundle and tie it shut. Wrapped up and ready to roll!


Flickr Photos

Categories