Archive for the 'felt' Category

Simple Felt Stuffed Critters

This was a project that spanned the last two weeks of our session. Students started by wetfelting abstract patterned squares using merino batt from Opulent Fibers.

20140330-123059.jpg

As we are constrained by the limits of a 60 minute period with 15 minutes to clean up before the next class arrives to use the space, the students felted their batts inside a zippered plastic bag, a method I discovered here. This is a great way to contain the mess of wet felting, but still give students the experience of working with roving and seeing the transformation into a new fabric. The only thing I have changed from this tutorial is the addition of a square of bubble wrap inside the zippered bag. This gives the felt a little extra friction as the students rub through the bag.

After using this method many times with dfiferent ages in several classrooms, I have observed most students are tired of rubbing their felt through the bag long before it is done. Singing songs together will sometimes distract students long enough so they can achiever a firm felt, but not always.

The week we wet felted these pieces, most students asked me every two minutes to check on their felt to see if it was done. The only student who really felted her roving into something sturdy enough to use for our subsequent sewing project, worked without stopping and without asking me to check her work for a solid 15 minutes. When class ended, the rest of the pieces needed a little extra rubbing and some hot water to make them super sturdy, so I finished them up at my studio.

20140330-121611.jpg

The week before our class, I photocopied cartoon animal templates from the back of several craft books. My intern cut out the templates, traced them onto cardboard and cut them out again. Students traced two identical patterns onto their felt with a marker and then cut them out.

20140330-121639.jpg20140401-203917.jpg20140330-121702.jpg

They added features to their stuffies with buttons, needlefelting, and embroidery stitches. After pinning the two pieces together, they sewed almost all the way around the perimeter, using either a whip stitch of a blanket stitch. Leaving a small opening, they stuffed fluffy bits of washed wool into the cavity, then stitched their creature closed. Aren’t they sweet?

Felt Heart Pockets and Vessels

Today’s project was a lesson in creativity, ingenuity and humility. As a teacher, I’m sure I learn as much from my students as they learn from me.  Before class, I had a project in mind and I had worked out how it was going to proceed, but I had not created a sample for the students to see. Some would say this is the best way to teach because the students don’t have a preconception of how a piece ‘should’ look to skew their innate creativity.

20140204-160515.jpg

We started out by drafting two layers of roving over a heart-shaped bubblewrap resist. After wetting the roving, we flipped the bundle, folded the roving over edge of the resist and then laid out two more layers of roving. The bundle was flipped again, the edges were folded over again to create a sealed package. If you want more detailed photos of the process, there is a felt vessel tutorial I wrote here.

Screenshot from 2014-02-14 10_30_57

The students folded their bubble wrap on top of the heart bundle and rubbed, gently at first and then more vigorously. When the roving started to hold together, they dunked it in warm water and then rubbed a whole lot more.

20140204-160546.jpg

This student project end up exactly as I had conceived it. After rinsing out the soap and giving it a dunk in a vinegar bath, the students cut a small slit near the top. They pulled out the bubblewrap to reveal a pocket. When dry, I imagined they would write a little valentine and slip it inside.

20140204-160535.jpg

The loop of single ply yarn (placed between the layers of roving when the batt was still dry) can be used to hang the ornament.

For one student, the bubblewrap resist shifted early in the felting process; her end result had three lobes and looked more like an anatomical heart than a typical valentine. She sliced it open, removed the plastic. Without skipping a beat she said ‘I wonder what it would look like if I turned it inside out’ and then did so. She pushed and pulled a little and suddenly it was a little vessel, perfectly sized for the turquoise felt ball she’d brought from home.

20140204-160556.jpg

It wasn’t long before the entire class had slit their hearts wide open and flipped them inside out. I didn’t grab a picture of the whole class set, but I have to admit they are much sweeter as little petal vessels than the hearts I had imagined.

Lesson learned: put down your expectations and step away from the table. You have no idea what power these children wield in their imaginations.

Felting Pictures

My studio fiber arts class created felt pictures this week. They started with merino batts from Opulent Fibers as a background then cut shapes out of the prefelt we dyed with Kool-Aid last week and added additional embellishments with small pieces of merino roving.

The merino batt allows novice students to skip the tricky step of drafting thin shingles of roving into an even layer. The batt arrives as a thick roll; once unrolled, it can be cut like prefelt and peeled apart to separate layers of the correct thickness for the project at hand.

20140129-101622.jpg

Once the details were in place, they squirted some warm soapy water over the felt. Since we didn’t want the wool details to move around, some students layered a piece of nylon tulle over their design. Other students folded over the bubble wrap to cover the felt, rubbing gently through the plastic.

20140129-101631.jpg

We peeked at the work in progress often to see how it was felting. The tulle only needs to stay on the surface until the layers of roving begin to felt to each other. Once the lines demarcating the cut edges begin to fade, the felt is firm enough to work directly by hand with a gentle rubbing motion.

While many traditional feltmakers roll the felt design and bubblewrap around a styrofoam noodle, then roll the whole package in a towel to accomplish a firm felt; I have found that it works just as well to vigorously rub felt by hand. In my experience, rolling felt in bubblewrap often causes creases to develop and skews the design. I rarely roll work, though there are exceptions to the rule. For the purposes of this class, it is unnecessary work and mess.

20140129-101645.jpg

Once the felt was holding together, we squeezed out the cold water and dunked it into a small basin filled with hot water. Then we bunched up the felt and rubbed it on the ridged mat covering my worktable. Using hot water causes the felt to shrink rapidly, so it should be used sparingly in the early stages to control the process.

To finish up the edges, we rubbed the felt with a glazed ceramic felting stone and a palm washboard. This helped smooth out the wavy ledges that don’t get as much attention in during the hand-felting steps.

20140129-101638.jpg

The students and parents were excited by both the process and the results.

Screenshot from 2014-02-15 17_39_51


It’s hard to make out the details for all the grins here, but the picture on the left is a giraffe sliding down a rainbow on it’s back. The middle picture is an ocean floor seascape. The picture on the right is a herd of anatomically correct cows.

Screenshot from 2014-02-15 17_41_15

To display work at home, thread a few pieces of yarn through the upper edge and tie to a pretty foraged stick.

Birth of a Felt Flower

Here’s a snapshot of the wet felting process I use to bring felt flowers to life.

20131101-080444.jpg

20131101-080435.jpg

20131101-080425.jpg

20131101-080415.jpg

The finished flower measures 5″ in diameter.

This blossom will be on its way to the Bainbridge Island Museum of Art gift shop next week.

Handsewing and Fiber Arts 5-7 yrs

This post is intended as an archive of the projects created in the fiber arts class I designed for the Family Learning Program. Taught weekly at the Southwest Teen Life Center in West Seattle, the Family Learning Program was established to provide curriculum enrichment to homeschool families.

Week 1: Sewing

20131102-094144.jpg

We started our class with the most basic skills needed in a hand sewing class. Students practiced threading needles with yarn and embroidery floss, tying knots at the end of their thread and sewing buttons onto recycled wool felt.

Week 2: Sewing

younger_pouch

In week 2, students created pouches with buttons and handles.

20131102-094231.jpg

They worked with manufactured wool felt, sewing side seams, handles and buttons with wool tapestry yarn.

Week 3: Needlepoint

20131028-114938.jpg

In the third week, we worked on needlepoint using rigid plastic grids. Students were shown how to do the simplest over-under-over stitch, which leaves some of the plastic grid visible.

To further explore this idea, plastic grids are sold in 10″ x 13″ sheets at craft stores. Cut a grid into six pieces, fill each grid with needlepoint and then stitch them together to create a box or a tote.

20131102-094257.jpg

We used wool yarn for this project as it will expand to fill the gaps between the grid lines nicely, but needlepoint is typically done with either wool tapestry yarn, cotton or silk floss. Separate the strands for fine color work.

For students ready for a further challenge, try stitching on gingham fabric, using the colored grid as a guide or move on to traditional needlepoint fabric which has a fine grid built into the weave. Draw a pattern on the fabric with colored markers, then follow the color changes with the floss. Some people find it is easier to handle fabric when held taught by an embroidery hoop, but this can be cumbersome and more difficult for some hands to manage. We started with plastic grids so students could focus on their stitching instead of worrying about keeping the fabric stable.

Recommend reading: Kids’ Embroidery by Kristin Nicolas

Week 4: Weaving

paperweaving

Students wove strips of recycled maps through scored cards. Some students created an alternating basketweave pattern, while another wove the same over-under pattern for each strip. The basketweave creates a tight construction, while placing all strips in the same slots creates a pattern with more movement.

Recommended reading: Kids Weaving by Sarah Swett

Week 5: Kumihimo (Japanese Braiding)

20131028-115012.jpg

Working on a smaller scale, students replicated an ancient process used to create heavy cord and rope. Students plied a seven strand braid using a cardboard octagon disc. The finished braid can be used as a friendship bracelet, a strap or an ornament.

The kumihimo discs were made with matte board. The slots will bend and wear out over time. To recreate your own disc, cut a square of stiff cardboard. On each side, measure and mark 1/4, and 3/4 of the width. Cut the corners between the 1/4 and 3/4 mark. This will create an octagon. Cut a slit halfway through each side, and poke a hole through the center with an awl. Cut seven lengths of yarn or cotton cord; pull the seven strands through the hole and knot together. Slip one piece of yarn through seven of the slots. From the empty slot, count 1…2…3. Pull the 3rd strand out of the slot and place it in the empty slot. Rotate the disc so the empty slot is now in front of you and count again 1…2…3. Make sure you are always working in the same direction (it doesn’t matter which) or you will undo the braid.

I read Farmer Brown Shears His Sheep by Teri Sloat in which a farmer shears his sheep, then takes the wool to be washed, carded, dyed and spun into yarn so he can knit colorful sweaters for the sheep. The students love the whimsical illustrations.
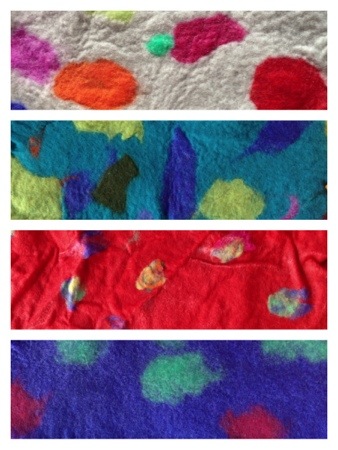
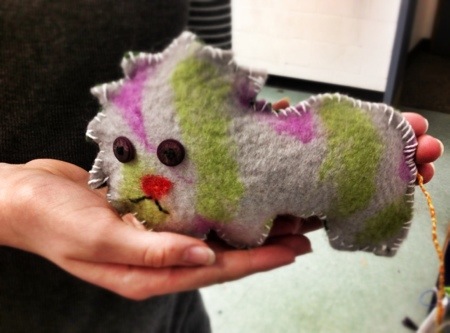
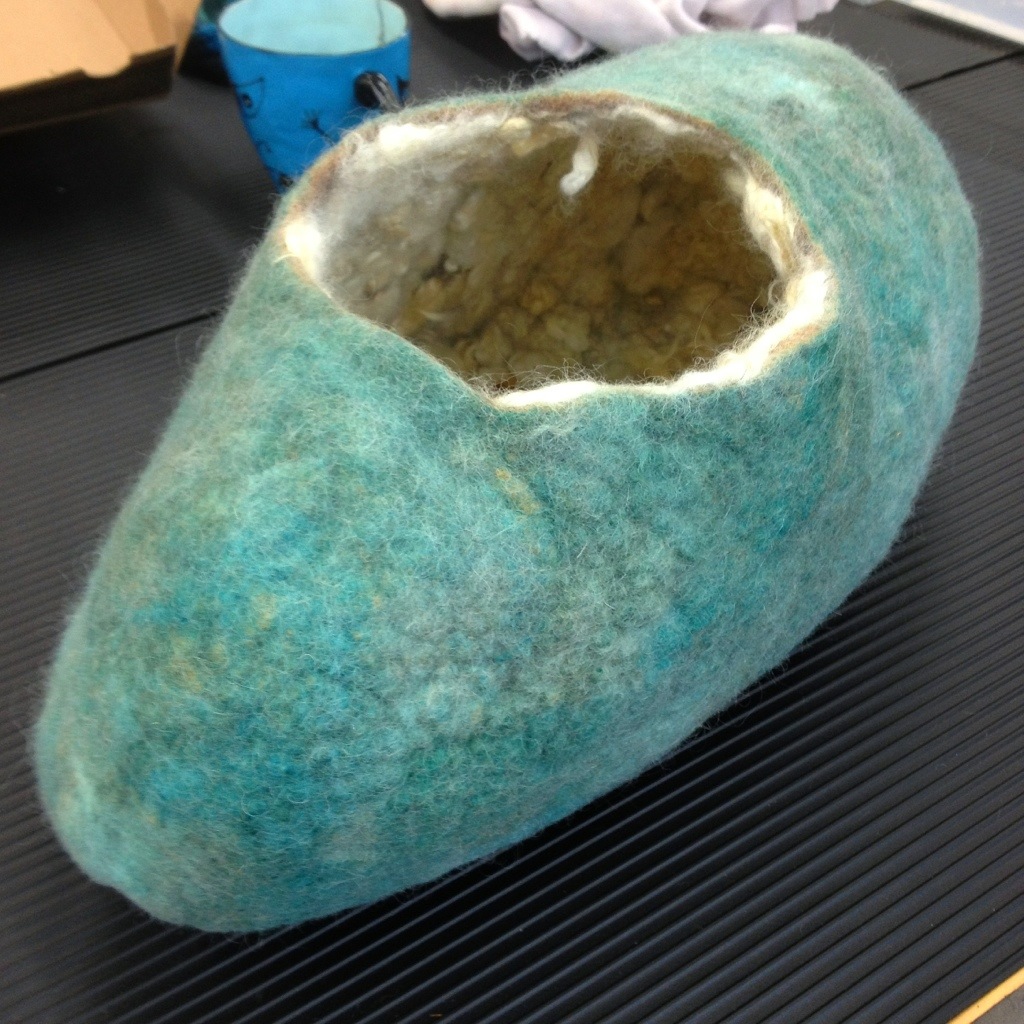
Week 6: Wetfelting

We jumped into my favorite subject this week: making felt from wool. I showed the students raw wool in the grease, and the same locks once washed. Then I demonstrated how the locks are turned into batt using hand carders.

20131102-094355.jpg

Next we laid out small pieces of merino batt on 10″ squares of batt I had previously cut. Dyed locks, yarn and small pieces of pre-felt were also available as additional embellishments. I chose to use batt to minimize the difficulties young students have with drafting fine layers of roving.

20131102-094457.jpg

Once the design was complete, we placed them on a 12″ square of bubble wrap, then slipped the batts into a ziploc bag, squirted in some warm soapy water, then sealed. We pounded the bags with our hands, rubbed the wool around on the bubble wrap and stomped on the floor. After ten minutes of vigorous agitation, we opened the bags to see how the felt was progressing. We poured a little more hot water on the felt, then rubbed some more. Once I determined the felt was finished, we rinsed and squeezed out the excess water.

20131103-173122.jpg

With a few minutes left in the class, I read Noah’s Mittens by Lise Lunge-Larsen. It is the only picture book about felting I know. It is a clever story that describes the effect of heat and friction on sheep in close quarters and the felt that results. Caveat: as the author relies on the story of Noah’s ark as the springboard to describe the discovery of felt, there are several God references, which I didn’t have the forethought to edit as I was reading aloud.

Recommended reading: The Art of Feltmaking by Anne Einset-Vickrey

Week 7: Sewing and Spinning

We started the class reading Feeding the Sheep by Leda Schubert, a sweet sheep-to-sweater story where a child learns why her mother cares for her sheep.

20131110-124648.jpg

As an introduction to spinning, we twisted and then plied a short piece of yarn. While one student held the end of the roving, the other student twisted until it the wool started to twist back on itself. The process was repeated with a second piece of roving. Holding the two pieces of roving together in one hand, I released the potential energy coiled within and the two bits twisted around each other.

20131110-112053.jpg

The students worked on sewing lavender sachets, which can double as small pillows for their stuffies and dolls. Using small pieces of cotton fabric, I pinned two pieces together wrong sides out, then the students whip stitched them together with wool tapestry yarn.

20131110-112101.jpg

Once they were finished stitching on three sides, we flipped them so the right sides were facing out then filled them with a mixture of rice, lentils and lavender. One more seam along the open side finished them off.

Week 8: Wetfelting Jellyroll Beads

We worked on another felting project this week: jellyroll  beads. This project demonstrates just how firm and dense felt can become, despite starting with light and fluffy wool. Students selected three sections of merino roving in different colors, then drafted small sheets into an aluminum pan, creating a striated stack. Just like preparing sushi, students rolled their stack of wool tightly into a cylinder. With a drizzle of soapy water in their pan, they rolled the cylinder of fluffy wool gently, being careful not to saturate the wool all at once. Over time, they increased the pressure on the cylinder until it was time to put all their strength into compressing the last bit of wool into felt.

20131125-173559.jpg

As we were working on plastic folding tables, it was difficult to get any traction on the surface. The cylinders did a lot of slipping and not much rolling. Working on a non-slip, textured surface will help in the final stages of felting. As I neglected to bring them in, I took the students’ felt logs back to the studio to finish. We will cut the beads next week.

At my studio, I work on a corrugated vinyl mat from the flooring department of your local home improvement store. I place the mat on a square of shelf/drawer liner also sold in home improvement stores to keep your dishes or silverware trays from sliding around. When the cylinders were firm and dense, I rinse out all the soap, then squeeze out the excess water.

Karen read Sophie’s Masterpiece by Eileen Spinelli while we worked on the jellyroll beads.

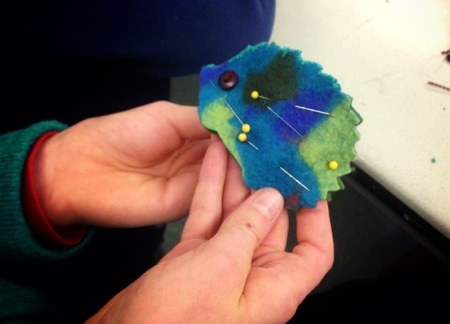
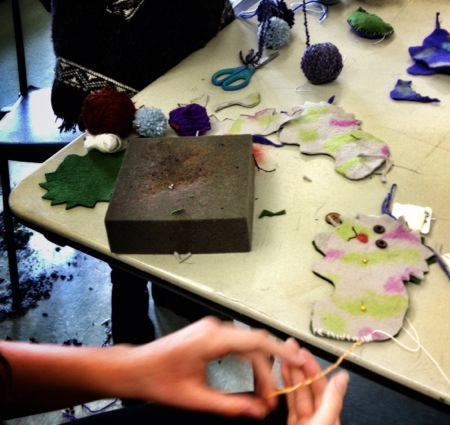
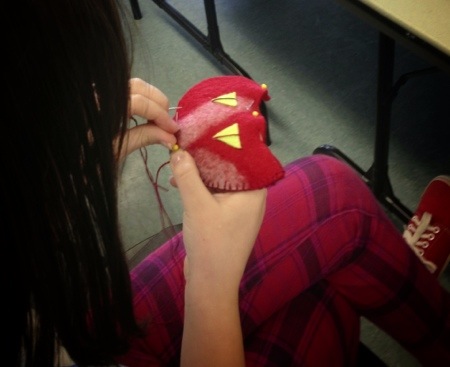
Week 9: Sewing Gnomes

In our last week together, we cut our felt jellyroll beads from last week and sewed tiny felt gnomes using industrial wool felt, carded wool batting, wool tapestry yarn and tiny bells. The pattern is from Freya Jaffke’s classic Waldorf book: Toymaking with Children.

20131125-173629.jpg

These gnomes would make sweet little ornaments for a doorknob or tree. The pattern calls for a single row of whip stitch along the hoodline and a slip stitch around the collar. The finished gnomes are stuffed with wool batting.

20131125-173706.jpg20131125-173742.jpg

One student brought her felt purse from Week 2. It was the perfect way to take home her felt gnome and jellyroll beads. I sense a color theme working through this student’s work.

There was just enough time at the end of class to read Woolbur by Leslie Helakoski.

Wooly Table to Ottoman

Several weeks ago, a customer asked me to create a pair of ottomans upholstered with sheepskins, similar to this previous project. She liked the concept, but wanted something taller and narrower that could double as either a footstool or a seat.

20130223-083835.jpg

The first step was felting enough sheepskin to cover the foam cores. This is not a true sheepskin in that there is no animal slaughter involved. Wool locks are laid over a wool batt. The locks felt to the batt to create something that looks similar to a sheepskin. I chose romney locks over carded romney batts because it makes a solid, durable felt and the romney locks have a beautiful lustre and curl. I laid out my full 8′ x 4′ workbench, but chose to cut it up into pieces to work in sections rather than felt the whole thing as a single piece.

20130223-083907.jpg

Next I sewed several pieces together to create a slipcover, which I stapled to a piece of plywood in the base.

20130223-083921.jpg

The last step was covering the staples to create a seamless bottom. A piece of woven upholstery fabric cut to size, spray mounted in place was covered with twill tape and upholstery tacks. This was more time consuming than I expected. Getting the tacks through the layers of fabric and sheepskin was difficult. I bent and broke twice as many tacks as I used.

20130223-083940.jpg

Some little rubber feet keep the bottom of the ottoman off the floor.

20130223-083954.jpg

The finished pieces measure 18″ tall and 14″ in diameter. The rigid foam creates a dense core which will not collapse, slump or squish. As with every custom project, I consistently underestimate the time involved, but I learn a lot along the way. I owe my mother an enormous hug for swooping in during the middle of the process; she sewed muslin slipcovers for an inside layer between the foam and the sheepskins to hold the plywood base in place. She also nursed me through the flu and took care of my family while I convalesced.

Feline Research and Development

An important of the design process is sending new products out for testing. Currently under development is an idea I have had kicking around for a while. Since my cat loves curling up on the sheepskins we have on our sofa, wouldn’t a cat bed lined with wooly locks be the cat’s meow? Today I felted my first cat bed: several layers of merino and blue faced leicester roving were felted with an inner layer of romney locks. The finished pod reminded me of an Inuit umiak.

20130221-201147.jpg

My studio partner, Maude, offered to take it home to test it out with Henry the Bold, a cat who hasn’t met a box he didn’t like.

20130221-201208.jpg

Reports from the testing lab show a few modifications are needed, starting with a larger opening. Back to the drawing board I go.


Bird in a Wooly Nest

The studio was bubbling on Saturday with the activity of six children and three mothers as we created nests, then birds and finally eggs.20130207-120021.jpg

We started with a base of willow branches woven together with yarn. Next we needled some clean wool locks in layers, building up the sides to create the soft part of the nest. This was the most difficult part of the day for some as it appeared to take a lot of very gentle poking before the wool held together. One mother designated herself official nest builder; she found the repetitive nature of the process meditative. There were bits of ephemera added to the wool: colored roving, ribbon, feathers and yarn to mix in the nest just as a bird might pick soft bits from the surroundings.

20130207-120007.jpg

Next we needled together a bunch of peeps. Again, one girl spent most of her morning focused on creating a single, perfect bird while others were content with a pile of fluff with eyes, a beak and wings.

20130207-115256.jpg

With an hour left in the workshop, we began wetfelting around styrofoam eggs. These two girls could have spent all morning working in the warm soapy water.

With children between the ages of five and ten years old, it was interesting to see which activity held their attention or captured their imagination.

20130207-115559.jpg

The mothers  wrote to me later in the day to tell me how much their children were captivated by their creations. Each family took home wool and kits to continue creating to their heart’s content.

20130207-120408.jpg

If you would like to join in the fun, there are four spots open for the next run of this class on Saturday, March 2nd. Send a message using the contact form to register.

Inviting the Spirit

A very special commission came my way recently: a liturgical stole for the ordination of a Lutheran minister.

20130126-180410.jpg

The only direction I was given was with regards to color: deep orange shading through red to burgundy. My first step was to order some custom dyed merino roving from WoolGatherings on Etsy.

20130126-180446.jpg

After felting several large pieces with four layers of roving, I cut them into small slices, then arranged them into a vague color progression, trying to keep a bit of randomness in the sort. Next I sewed the strips together with a zigzag stitch, abutting the edges.

The last element was a ball of flames symbolizing the Holy Spirit. I cut a piece of silk paper then machine stitched it in place.

The final piece filled my studio with a fiery warmth. It was an honor to create something of such significance.


West Coasters

When a prominent museum gift store asks what new products you have for their store, the gears start turning. Taking a friend up on an invitation to wander around Capitol Hill for a morning, we went for coffee, wandered around Volunteer Park and then visited a few mid-century design stores. By the time I made it to my studio that afternoon, I had an hour to work on an idea that occurred to me as we drove through the city. Pulling out a felt remnant, I stitched some irregular shapes in imitation of topographical maps.

My first prototype received a green light from the buyer at the gift store, so I set to work on the real thing. Inspired by the distinctive colors of Puget Sound, the alpine meadows around Mt. Rainier and the paloose of central Washington, I imagined three colorways reflective of the colors in these regions.

After creating sheets and sheets of merino prefelt, I cut hundreds of circles. Pulling together the colors was the most fun I’ve had in a long time.

The riot of color was intoxicating. Once everything was felted, I cut the circles and machine stitched the lines to create greater definition and contrast.

The next project was deciding on the packaging. Price point and hand-feel were the two factors that led me eschew any fussy plastic packaging. People need to touch something this soft. Maude May designed the tags and branded the coasters, inspired by USGS map TWA 1627 Glacier Park,  TWA 1623 Frosty Meadow and TWA 1680 Methow Valley.

West Coasters felted topographic coasters are now available at the Bellevue Arts Museum gift shop and in my Etsy shop.


Flickr Photos

Categories